Key fob attack mitigation
TL;DR
Freaked out over key fob cloning/relay attacks, hated faraday cages, hacked power switch into key fob.
After several high-end Dodge Chargers/Challengers were stolen from two different dealerships locally, I went down the rabbit hole of security for these cars and was woefully disappointed. It seemed like the issues are: neutral strap accessibility, odb2 key theft, key cloning/relay attacks. I believe the RF-hub update prevents the odb2 key theft and disabling passive entry helps mitigate the relay attack, but the signal cloning seemed to be a separate issue; if I understood any of the stuff I read and watched correctly.
My initial thoughts were for security to get new keys programmed and stored away in home made faraday pouches, rf hub update, GPS/Engine/Vibration detection tool, kill switch, passive entry disabling and then a faraday box for my key fob.
I focused mostly on the key fob security. Having one of these faraday pouches/boxes is super annoying and clumsy and really just didn’t feel practical long term. While reading forums someone mentioned something about being able to turn the key fobs off and a little light went off in my brain. I can’t take credit for the novelty of adding a switch to a keyfob but I certainly did add one through some minor trial and error. Basically I was able to add a tiny slider switch to my keyfob that disables the battery, quick, easy and with minimal noticeability.
The little project really only required some super basic electrical knowledge and basic soldering skills. I’m by no means great at either of these things but knew enough to get by, but not without some issues. The overall goal was to break the positive electrical current from the battery to the opposite side of the fob that powered the entire thing.
The problems I ran into were
- None of the metal contacts inside the key fob would take and soldering, any connection points I made just sort of detached after the solder hardened. Even super glue and a hot glue gun yielded limited success.
- Cutting into the fob case to open up a small hole for the switch. I ended up using the soldering iron tip to melt the plastic, slowly, to create the hole which yielded a slightly larger hole than required and it’s fairly ugly. I just don’t have the patience for doing the “pristine finishing job”.
- Fitting the one side of the fob together with a tight seal due to the melted plastic
- Part sourcing
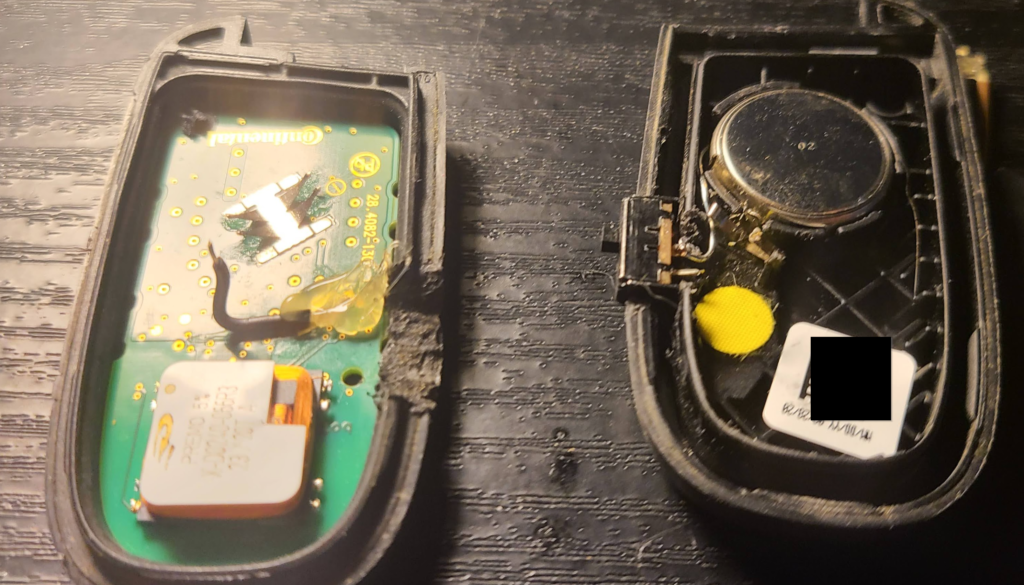
The final internals are a bit different than the first picture shows. I had to basically solder a small piece of solid copper wire to the end of the switch ‘pin’ and bend it in such a way it would make contact where the original battery contact was, then put some glue/electrical tape down to keep it from moving and to block any contact with the original contacts, and to keep it from touching the other pin on the switch. The glue job is atrocious, not sure if I have the patience to clean it up anymore at the moment. There were some gap with the two fob halves around the switch, but it was still held together tightly and not in danger of falling apart.
Here are some pictures, be gentle with the critiquing