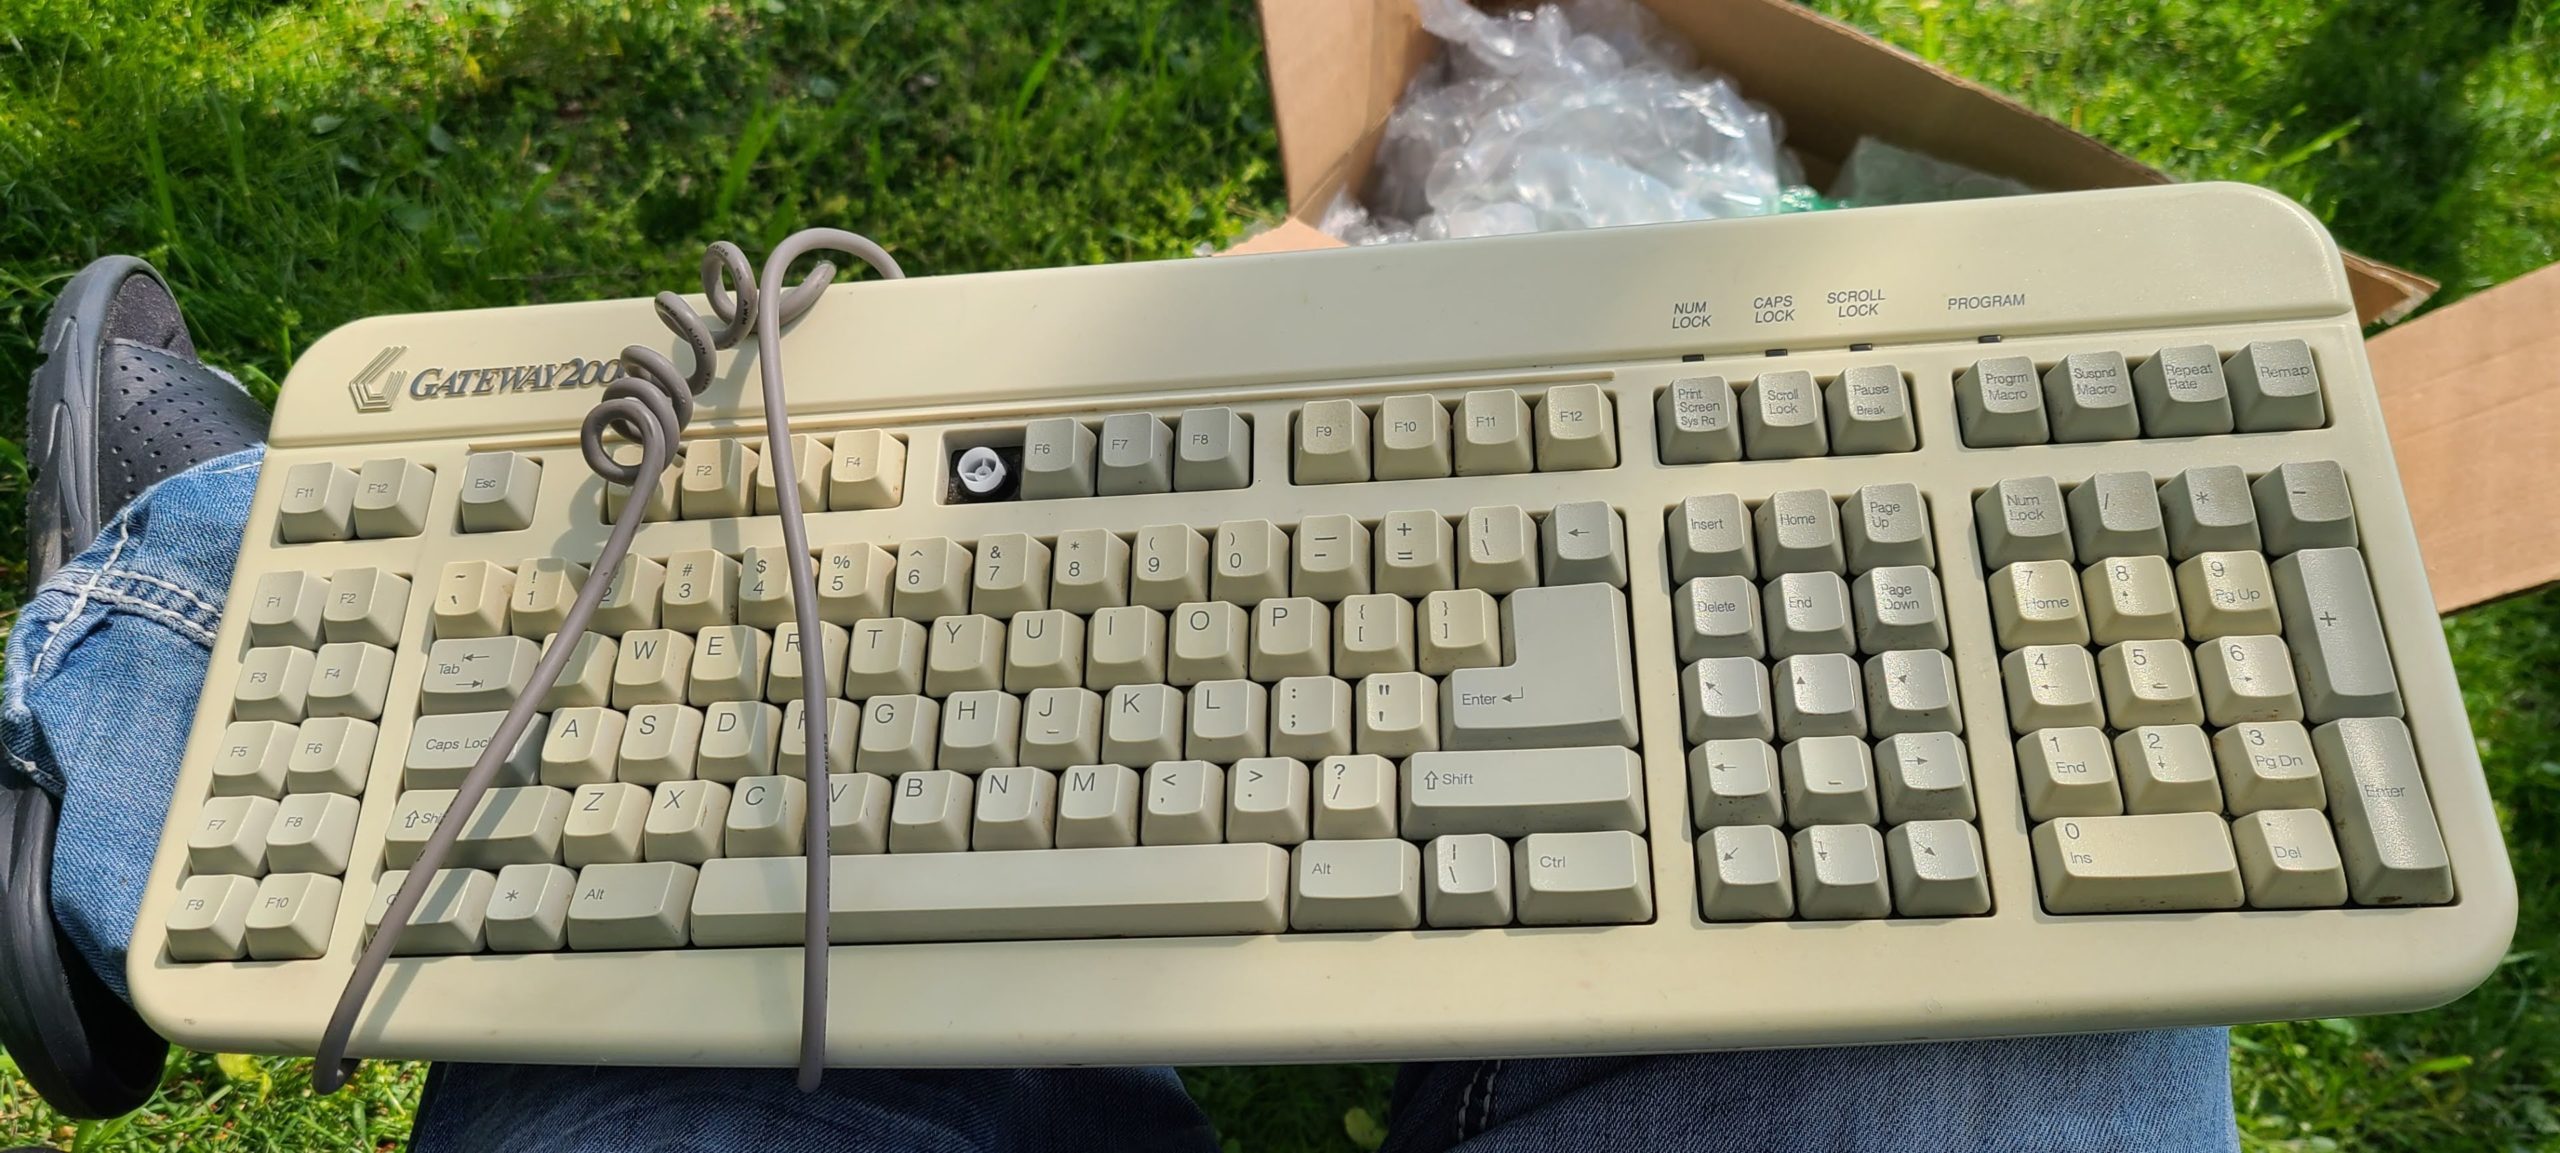
Gateway 2000 Anykey
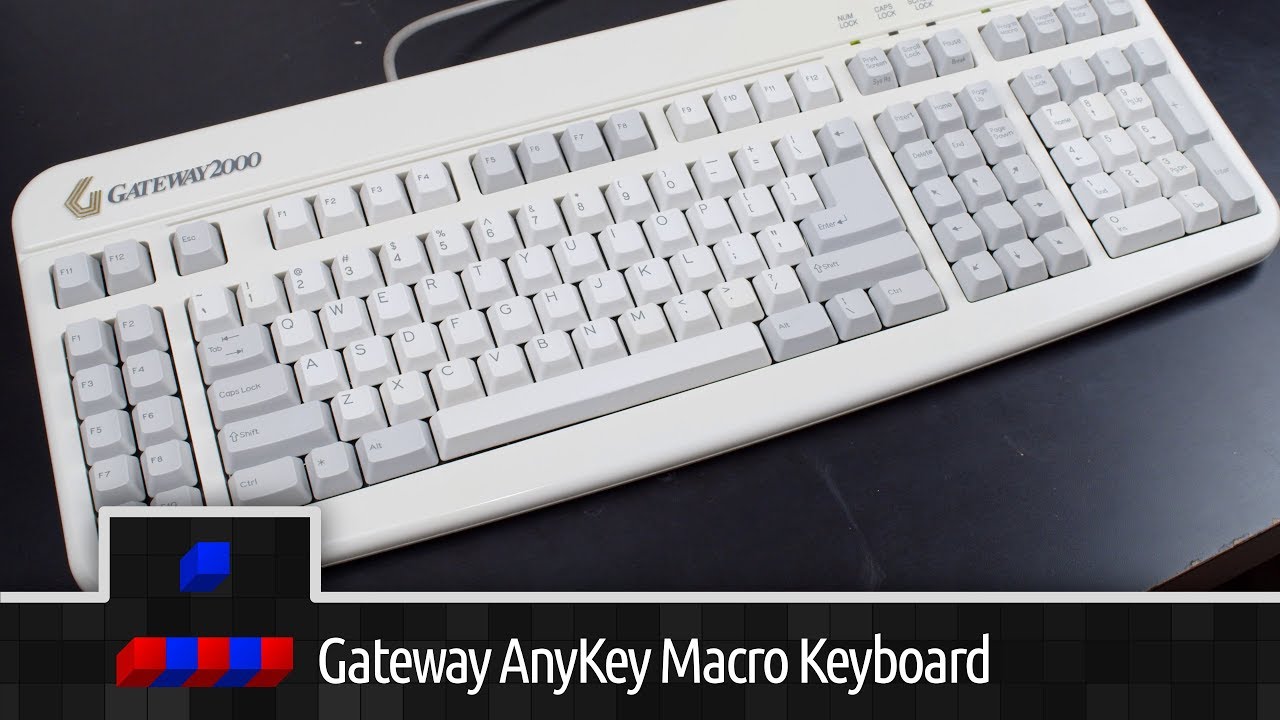
I learned to type, game, code, and basically use a computer on one of these old Gateway 2000 keyboards in the early 90s and continued to use one up through the early 2000s.
Pictures at the bottom!
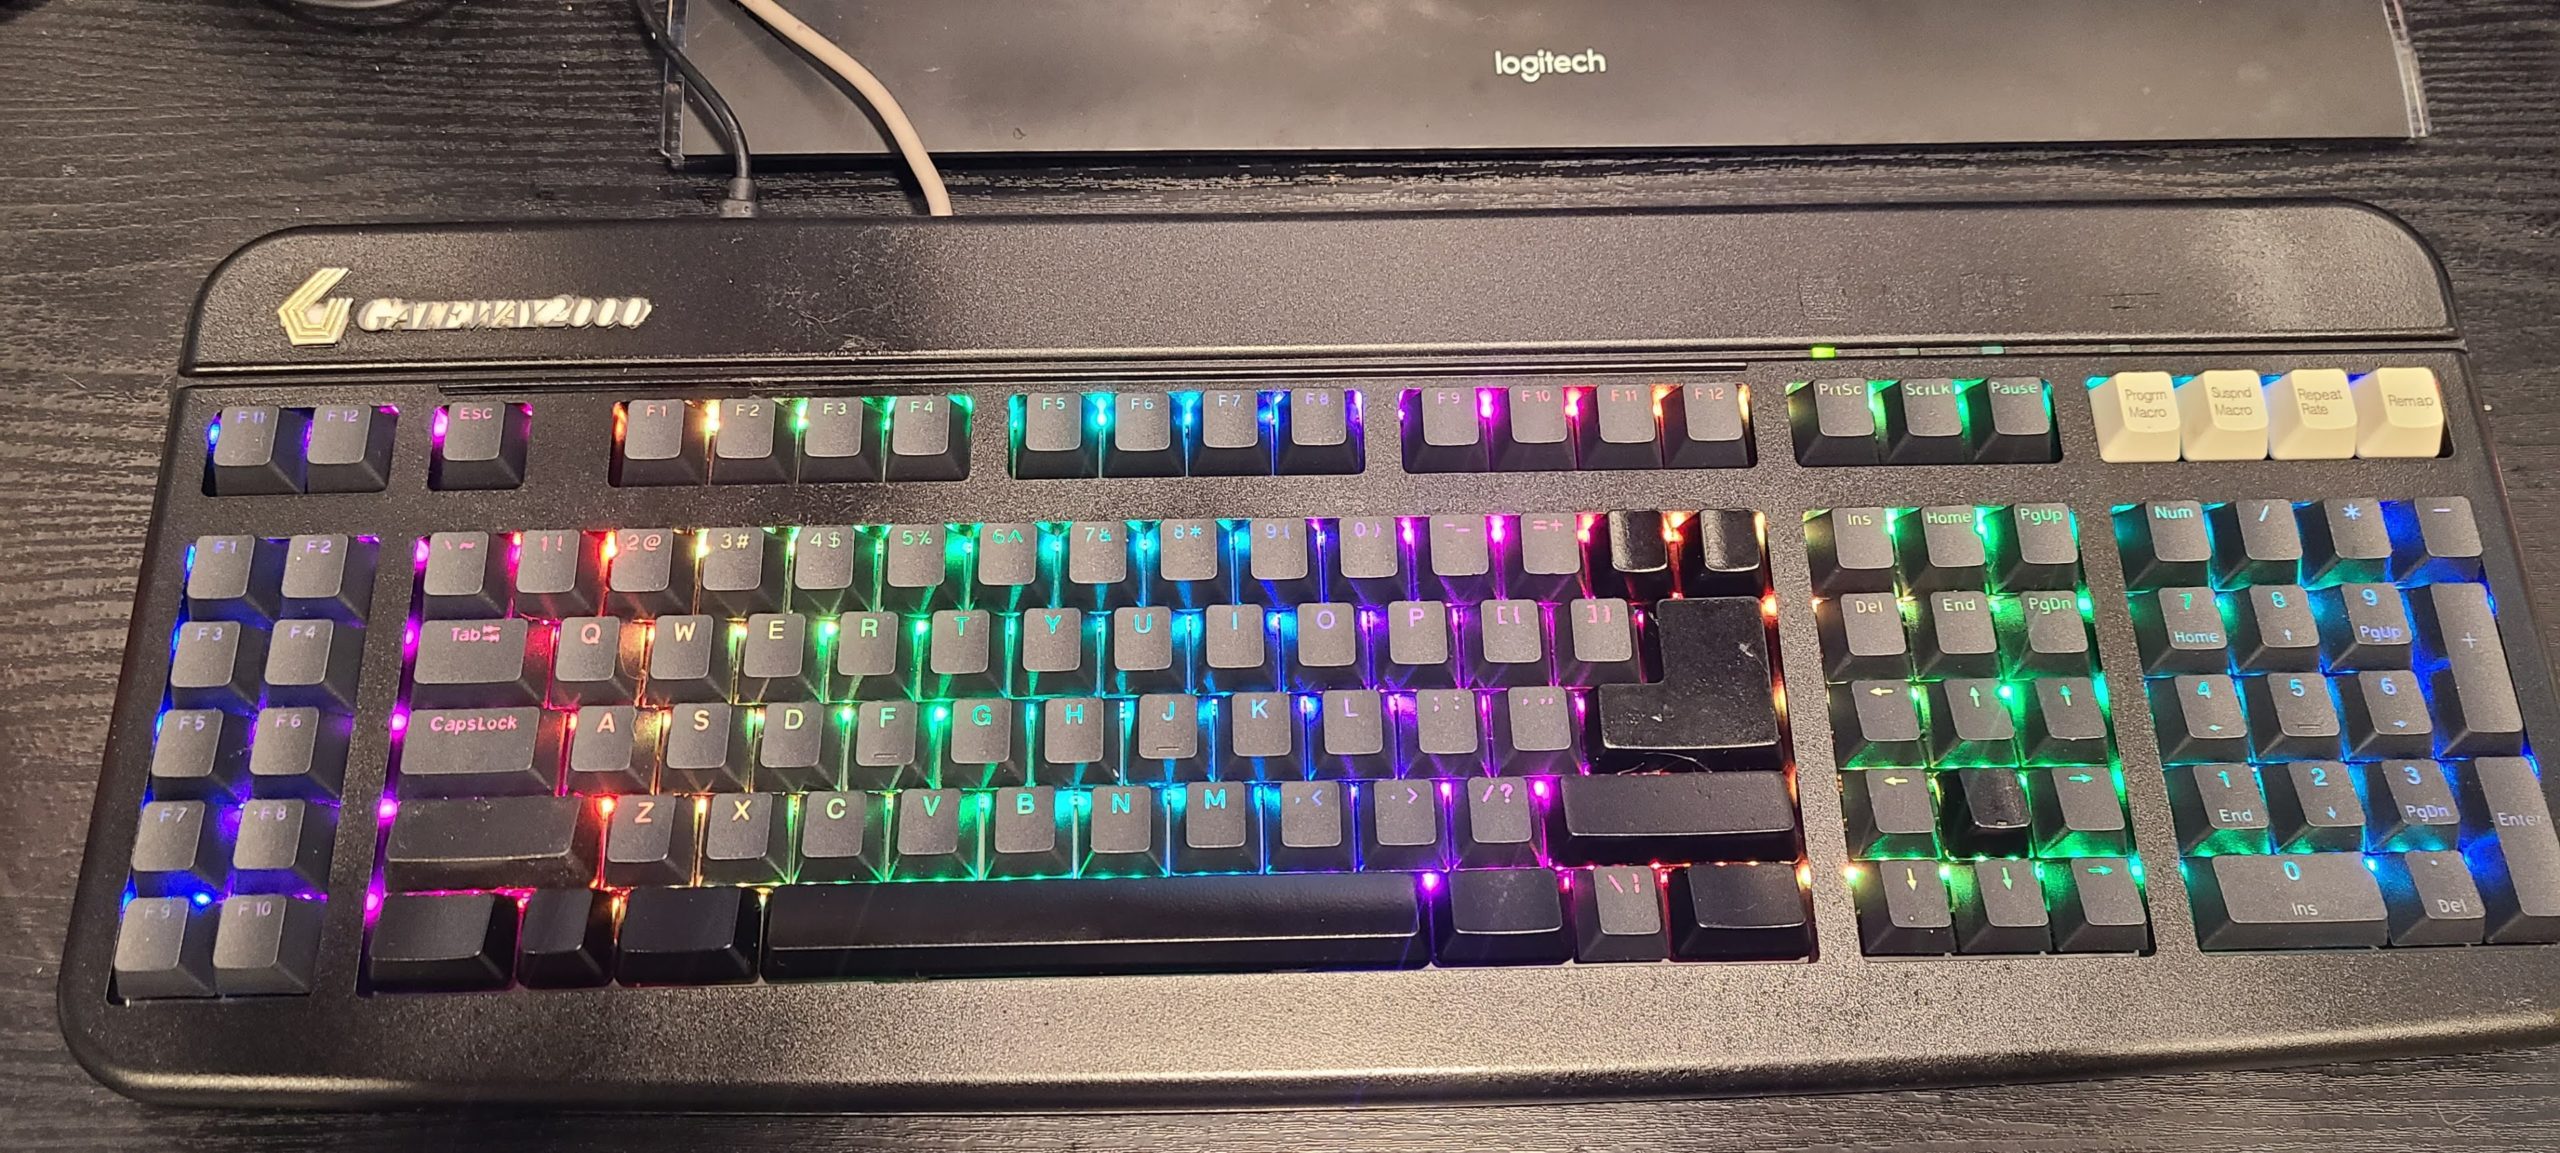
I mostly learned to type, game, code, use a computer on one of these old Gateway 2000 keyboards in the early 90s and continued to use one up through the early 2000s. The keyboard was really awesome for having the extended layout and programmability. You can remap keys directly from the keyboard itself, OS agnostic. You can program macros of almost unlimited length to each key, change the repeat rate, etc. It was also incredibly great for gaming, including FPS, with the enhanced direction pad. In addition to the up/down/left/right, there were diagonal keys (which simulated both directions in one keypress), AND most importantly, another SPACE key dead in the middle of all the arrow keys. This eliminated the need for the standard WASD gaming layout, which I didn’t even know was a thing back then, and really reduced finger travel to move around, jump and use any of the home/end/page keys directly above it as opposed to awkward mappings further to the left, in my opinion anyway. As I got older and had to replace the keyboard, I was seriously disappointed that these features were almost non-existent in other brands. Sure, it’s a membrane keyboard instead of mechanical (spare me, please), but the keys do have a pretty strong tactile feedback with a light click. The build quality is great too, this thing is very heavy and sturdy even compared to my Corsair K70 RGB. Another benefit is the keyboard uses Cherry profile keycaps instead of OEM. The shorter profile helps a bit with finger movement and arthritis.
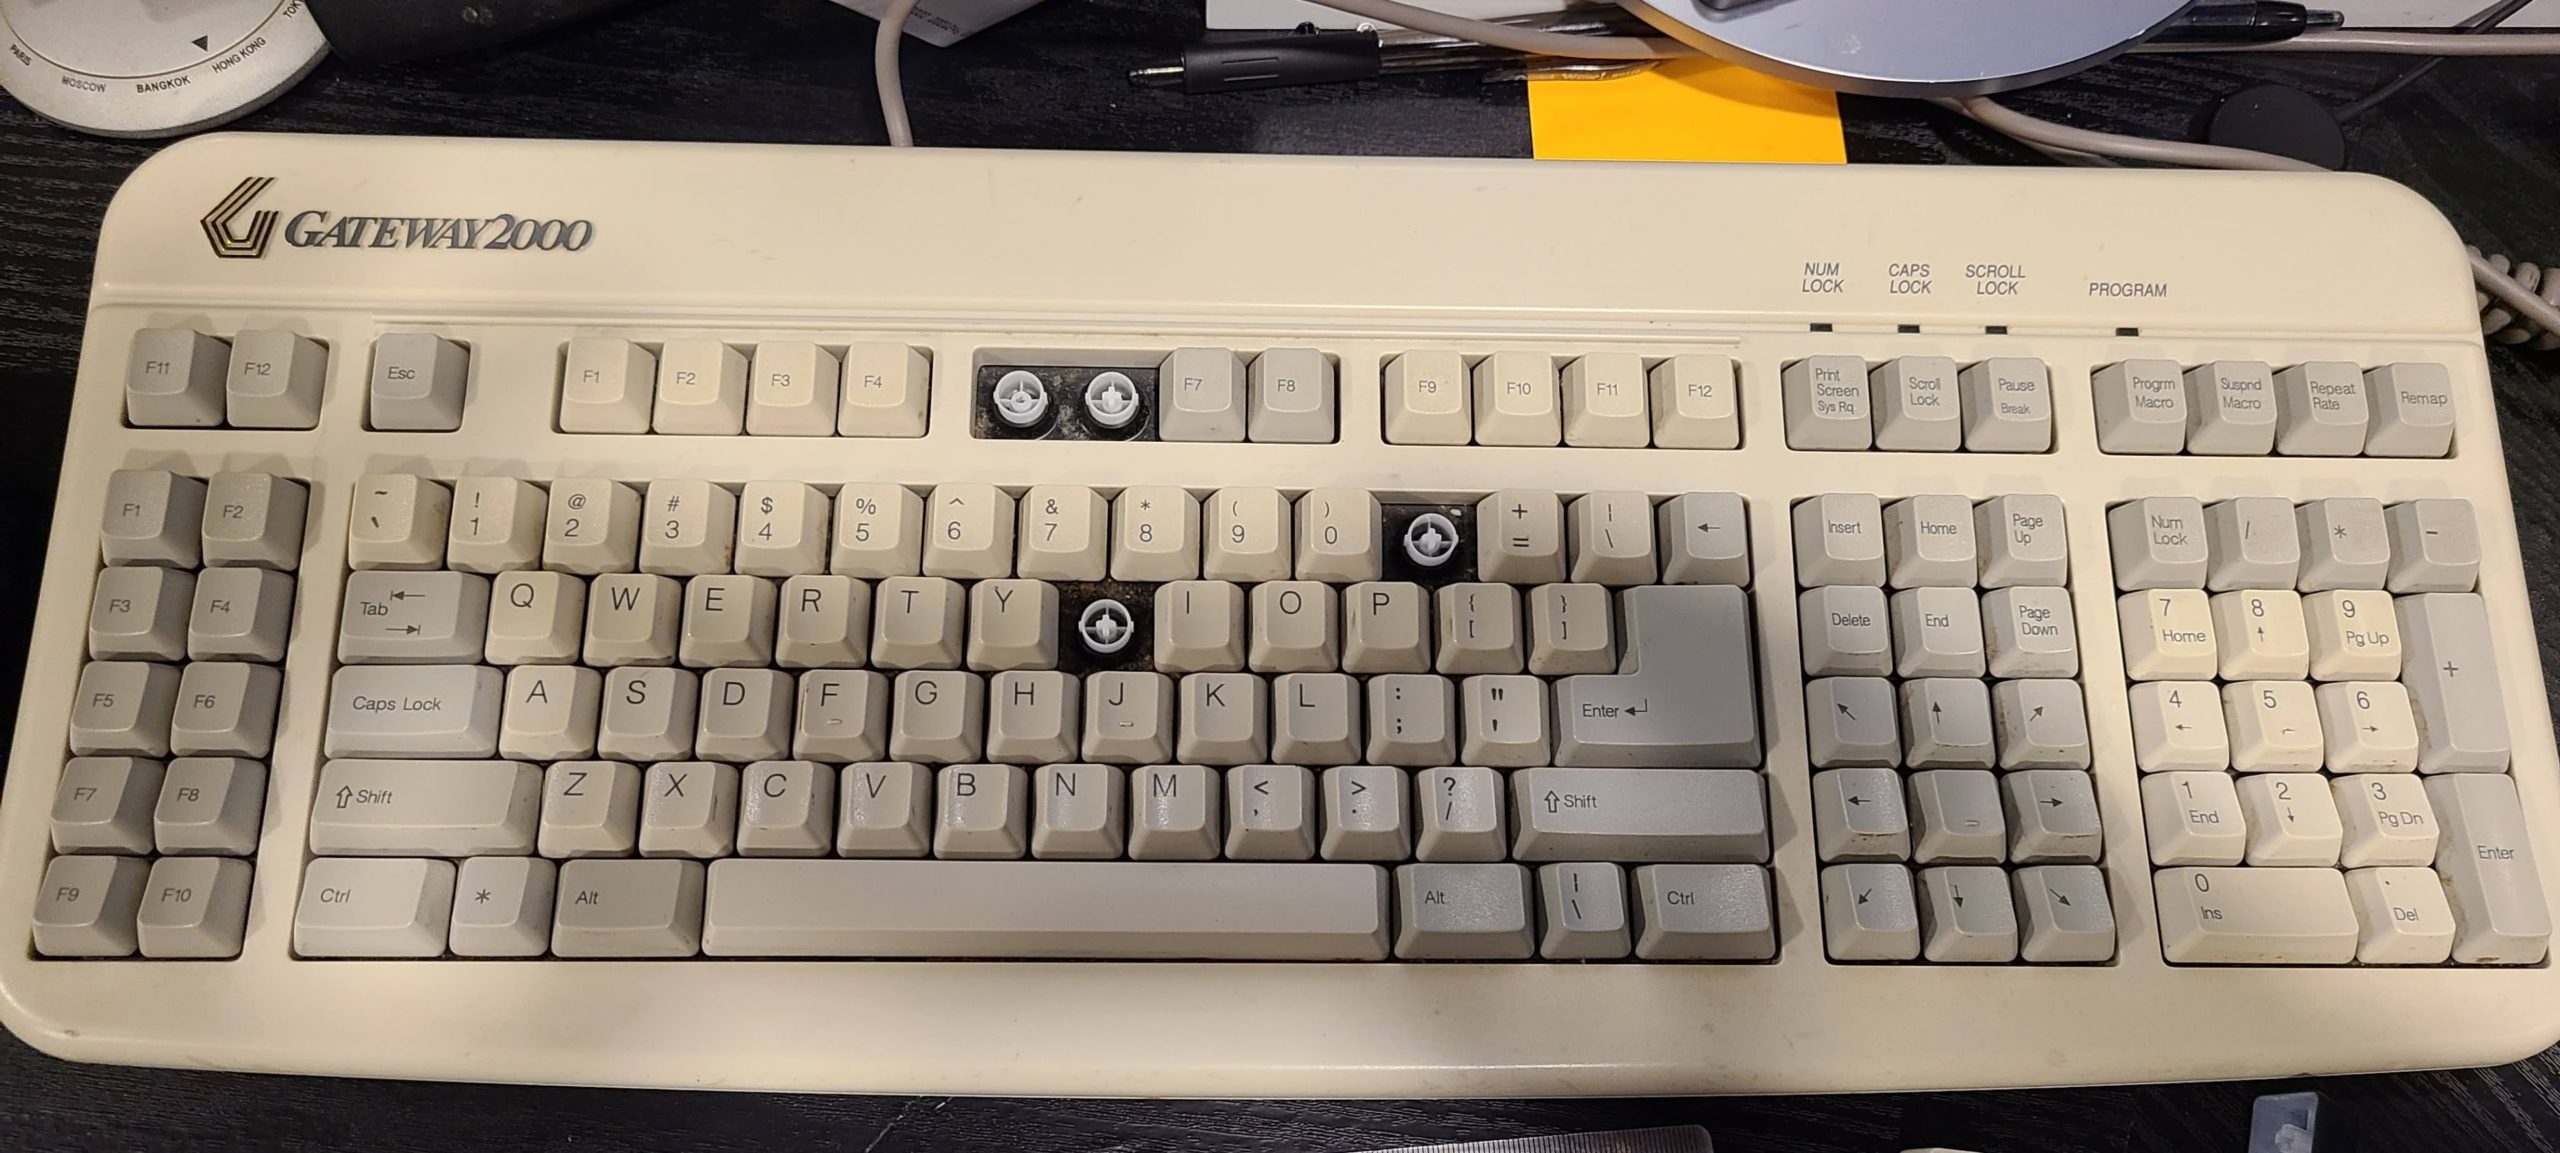
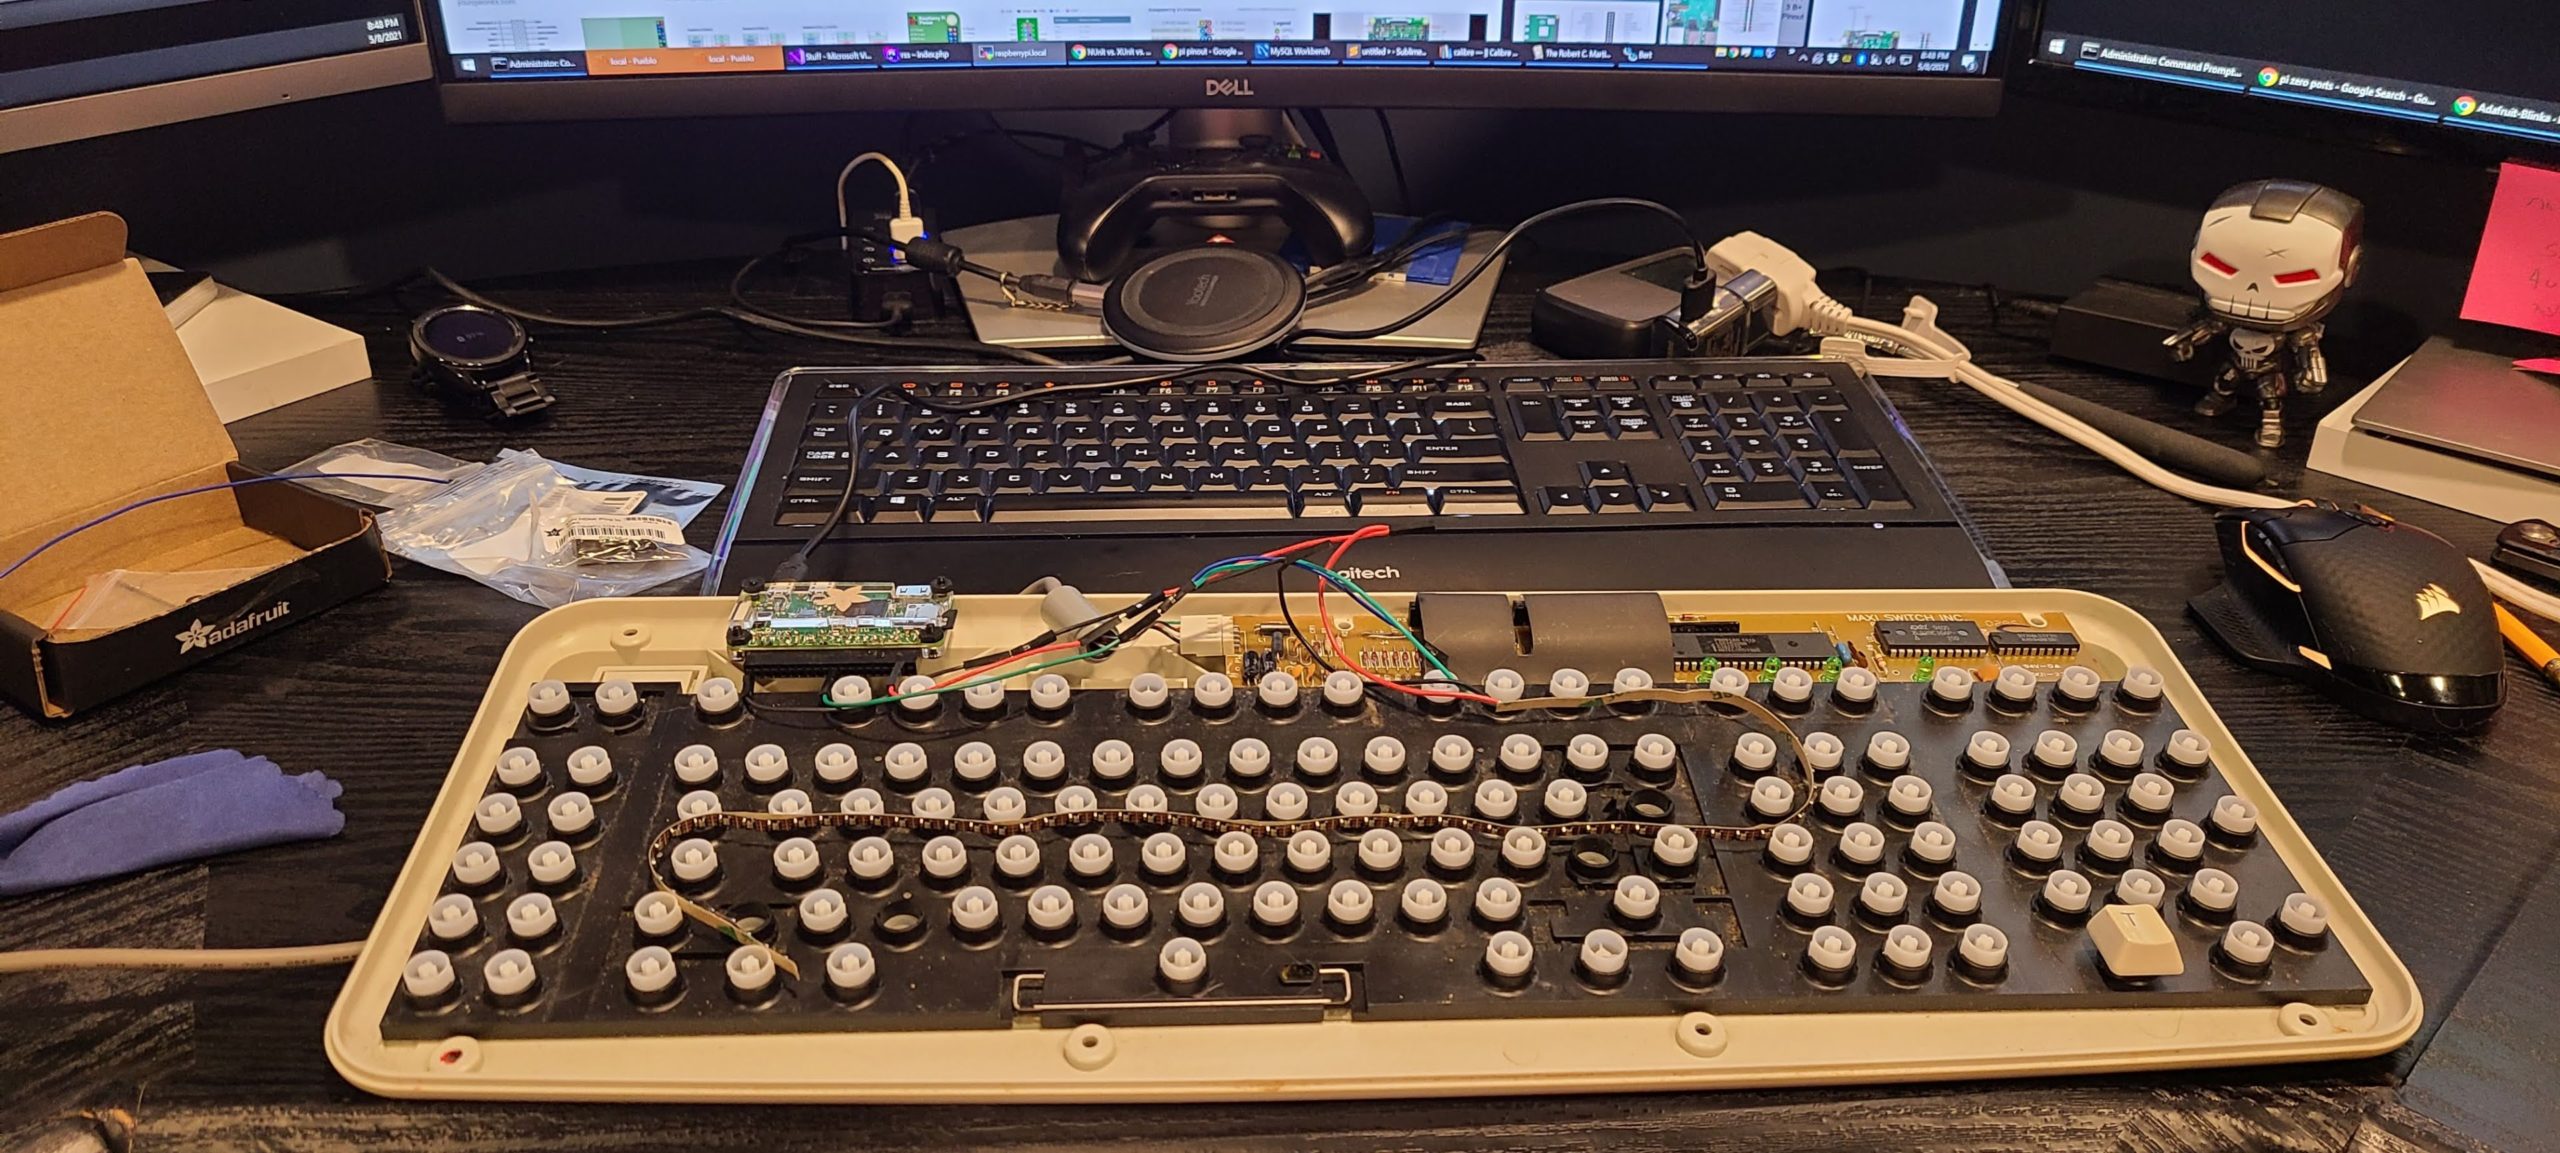
There’s a bit of nostalgia here and I’m not quite sure how the idea for this project started but I ended up grabbing 3 of these off of eBay for this project; one I wanted to keep original, one for the project keyboard, and one for spare parts. Unfortunately most of the keyboards are well over 20 years old, some even nearing the 30 year mark, so finding a completely working one is rare. The later generations / models have the Windows key while the older ones do not. What I learned though, is the older models have cherry style “slider switches” (which aren’t actual switches) and accept all cherry mx style keys and the newer models, with the Windows key, are an entirely different setup, construction build, hardware, etc under the hood, as it were. Entirely useless for parts except for potentially the keyboard casing.
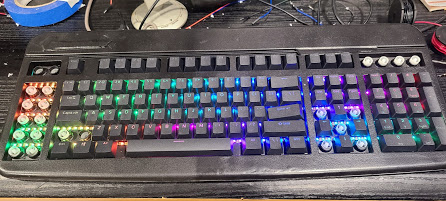
The idea for the project was to sort of faux-modernize the keyboard. Many of the gaming keyboards are full of RGB (led) lighting, cooler colors, etc. I wanted to add some lighting to this keyboard, chance the keycaps, paint it a different color, make it look more modern, while keeping its original features.
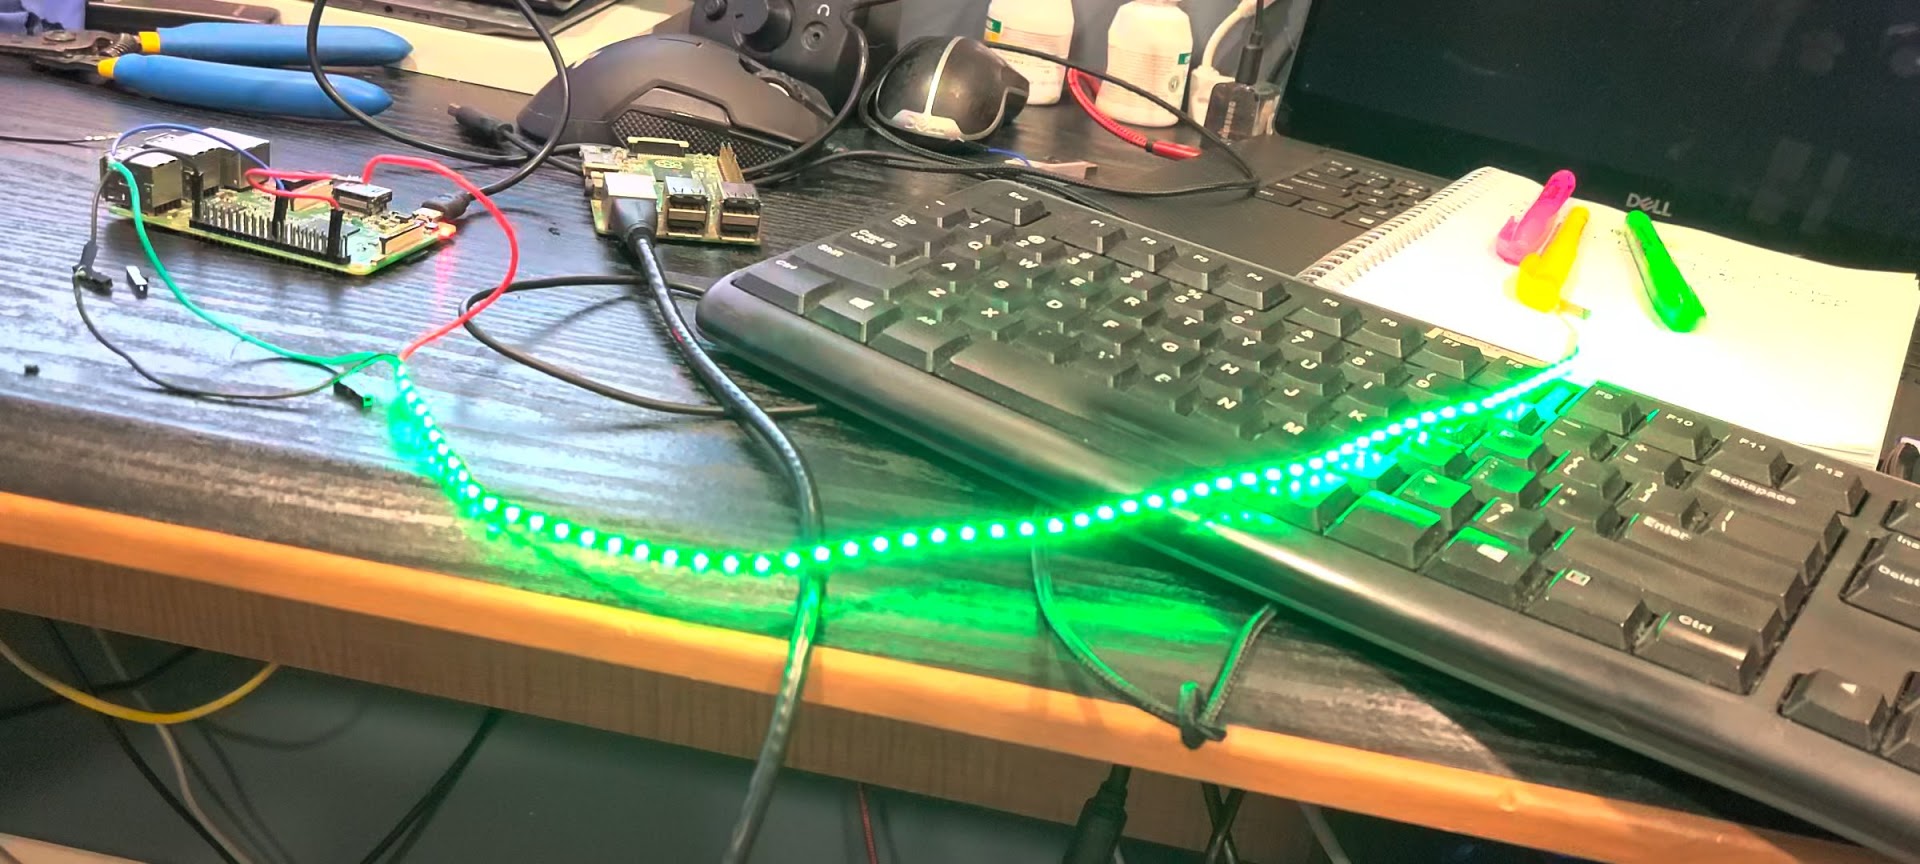
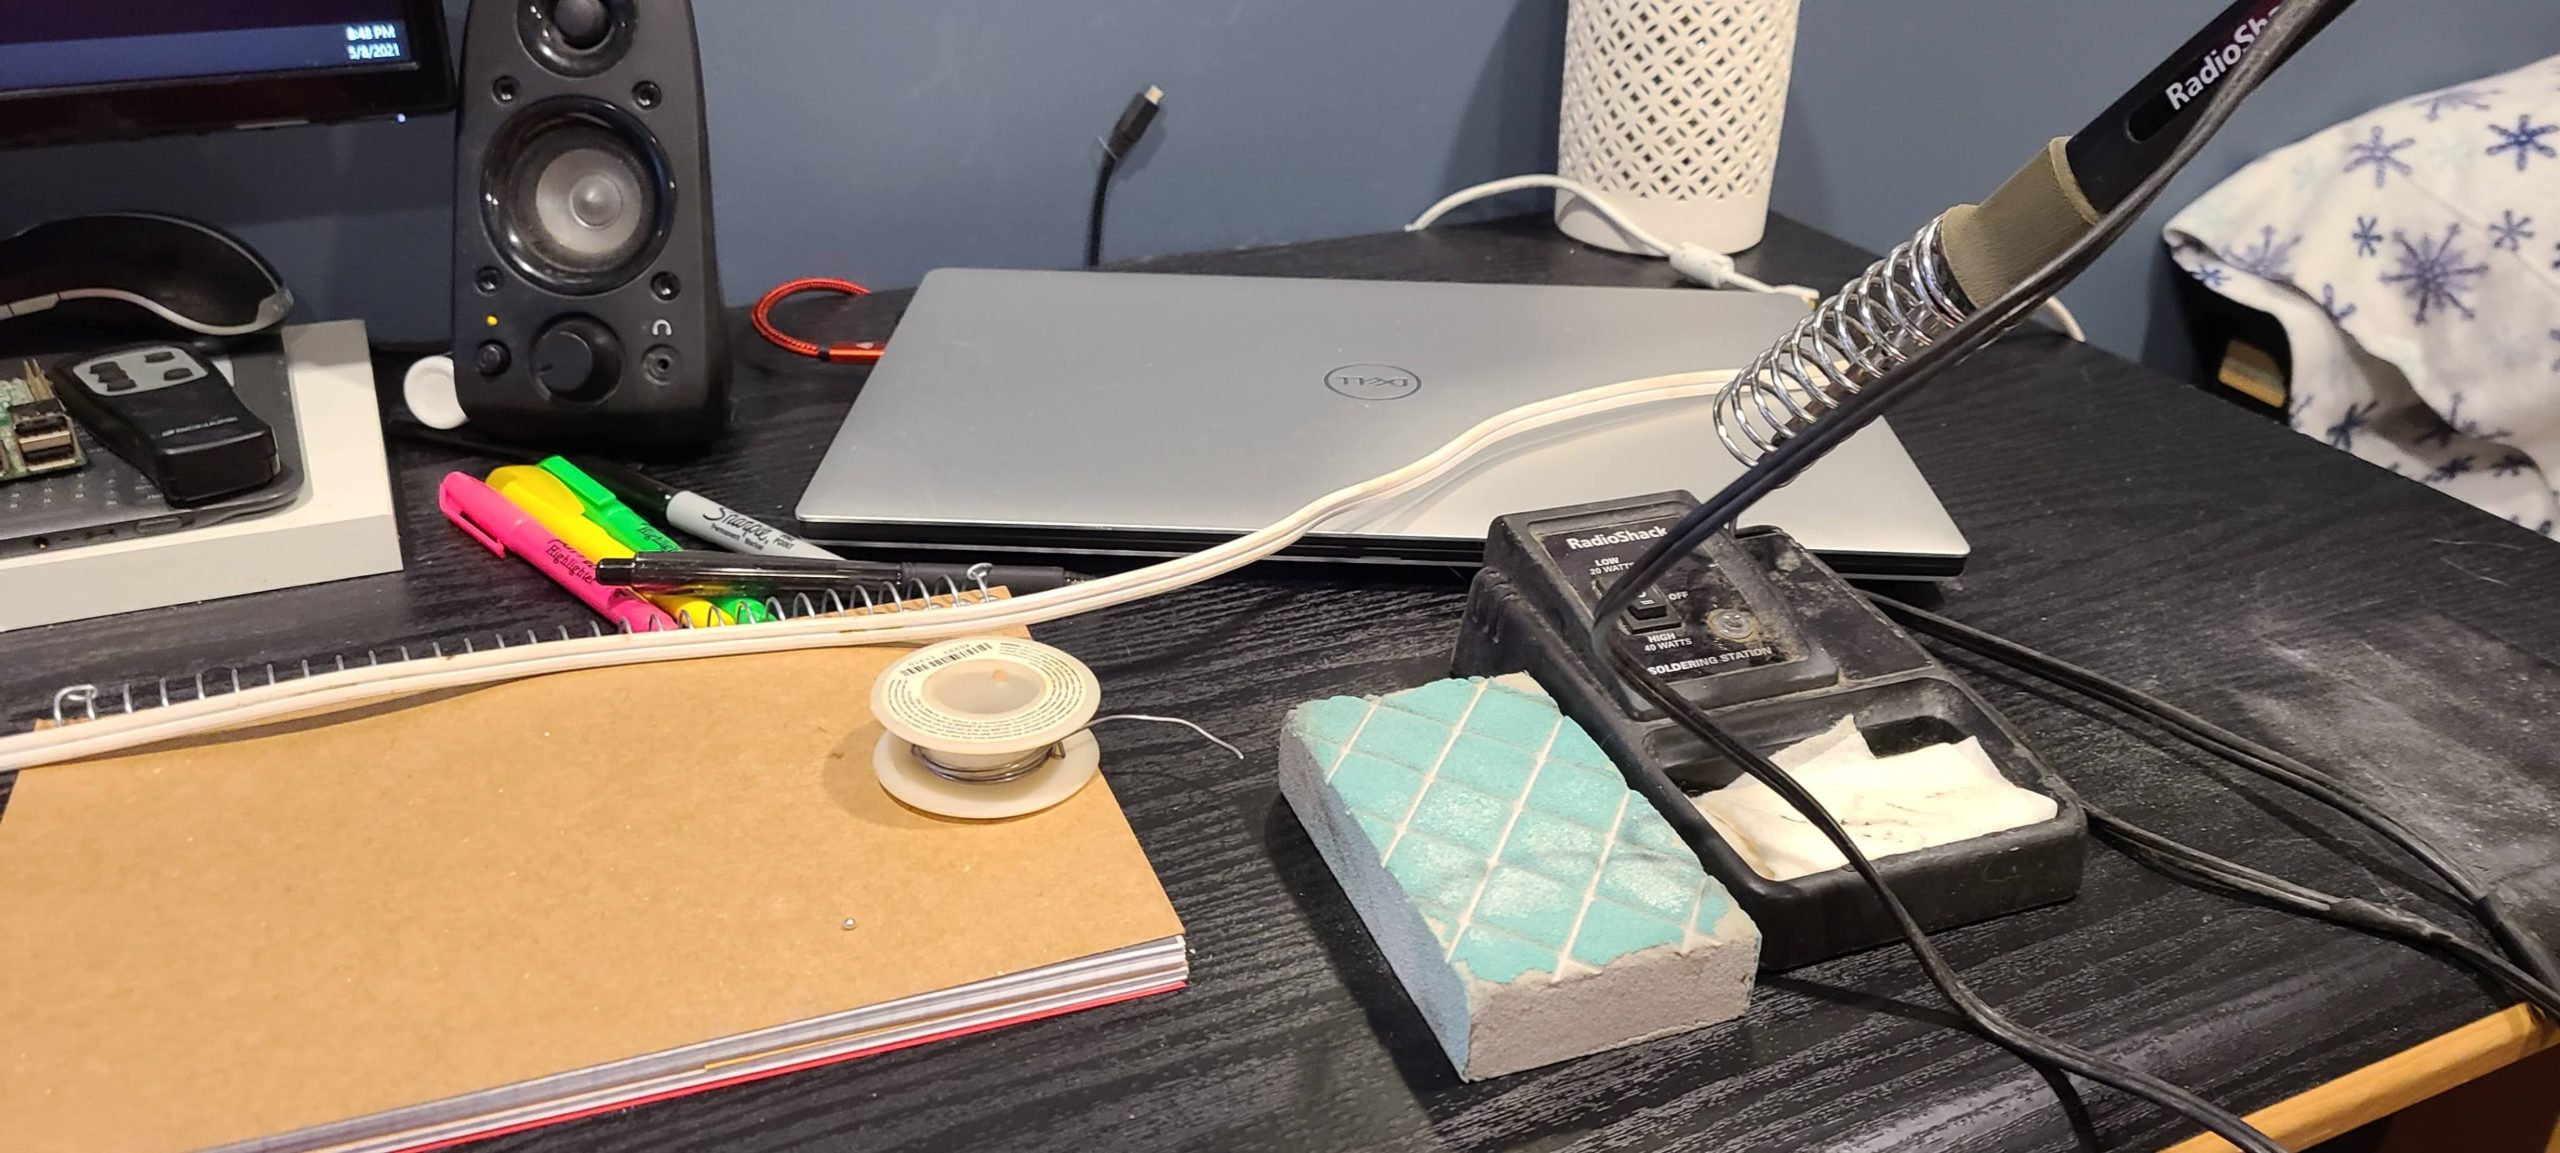
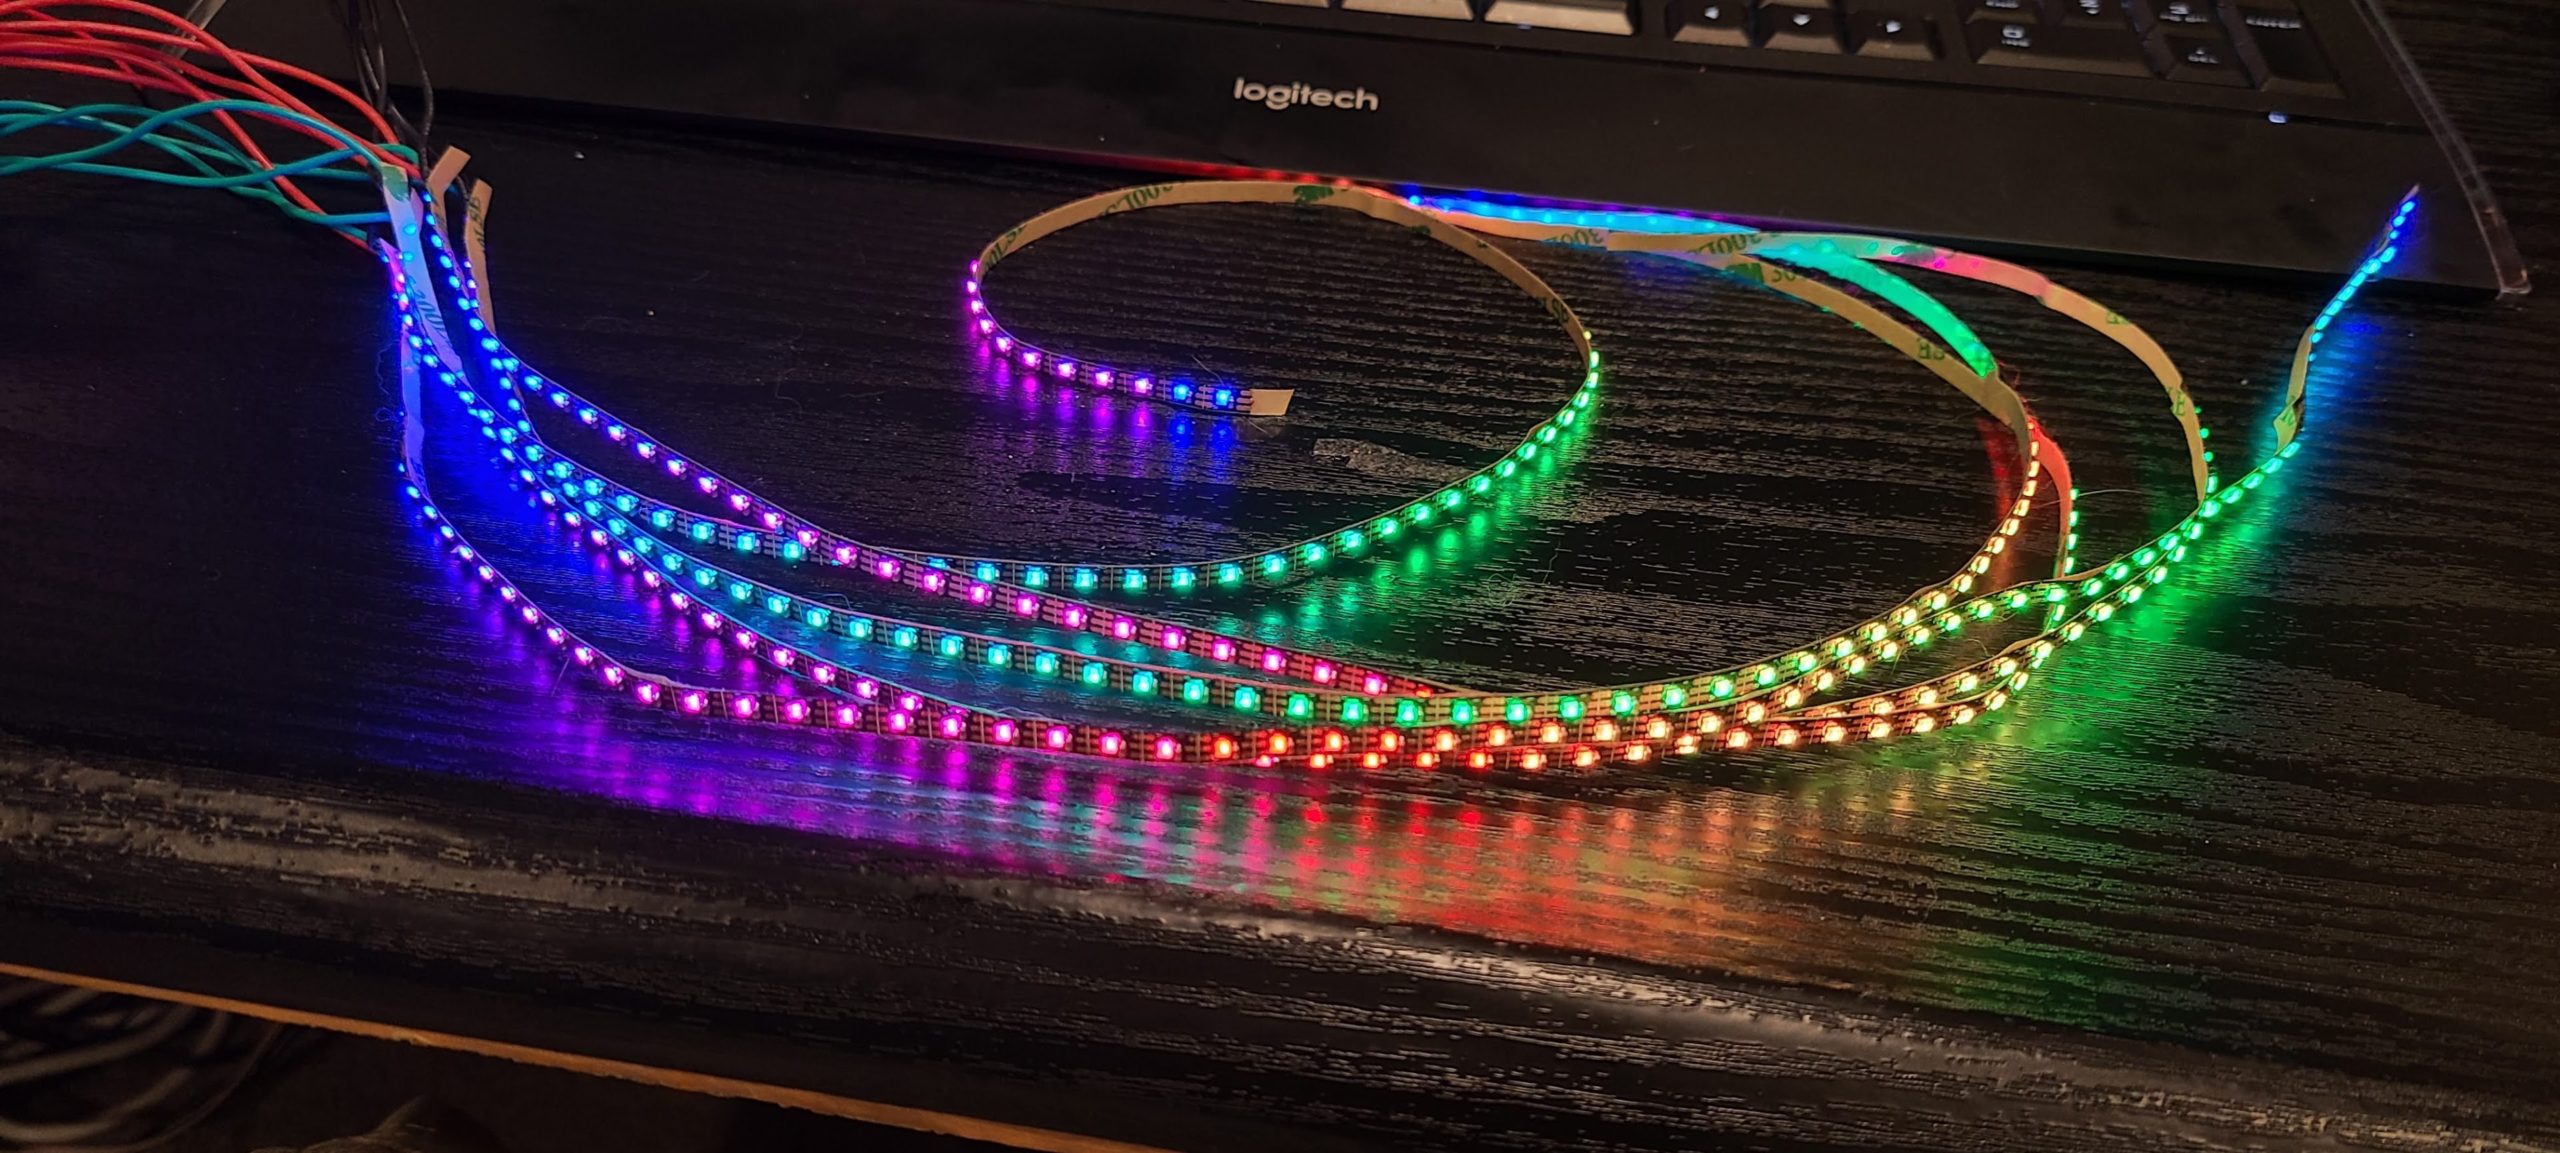
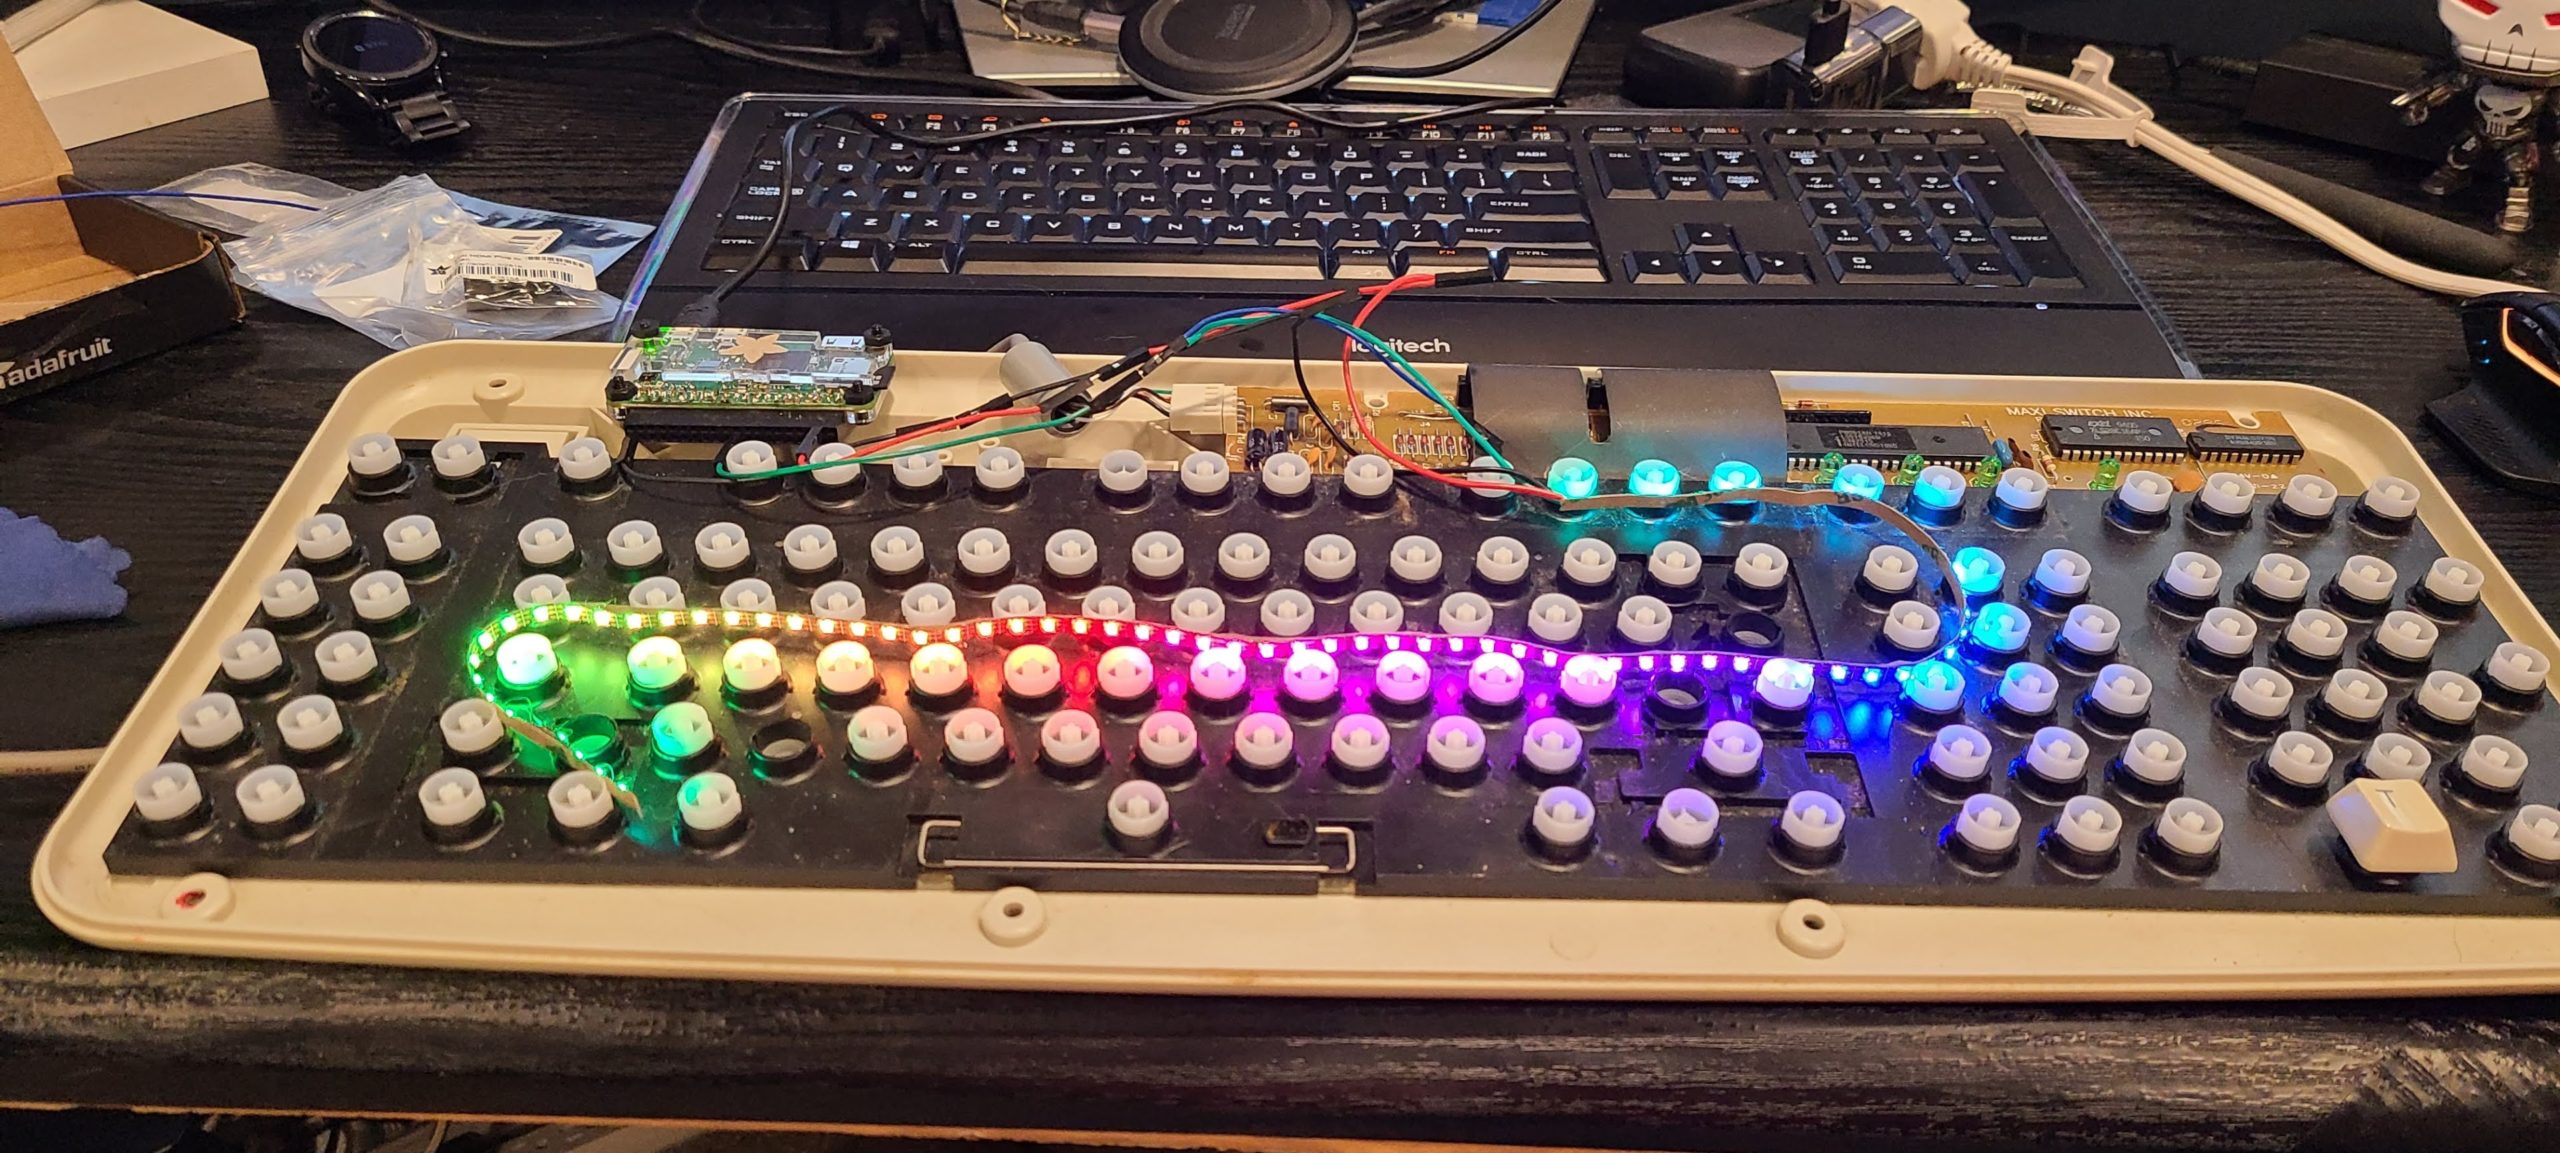
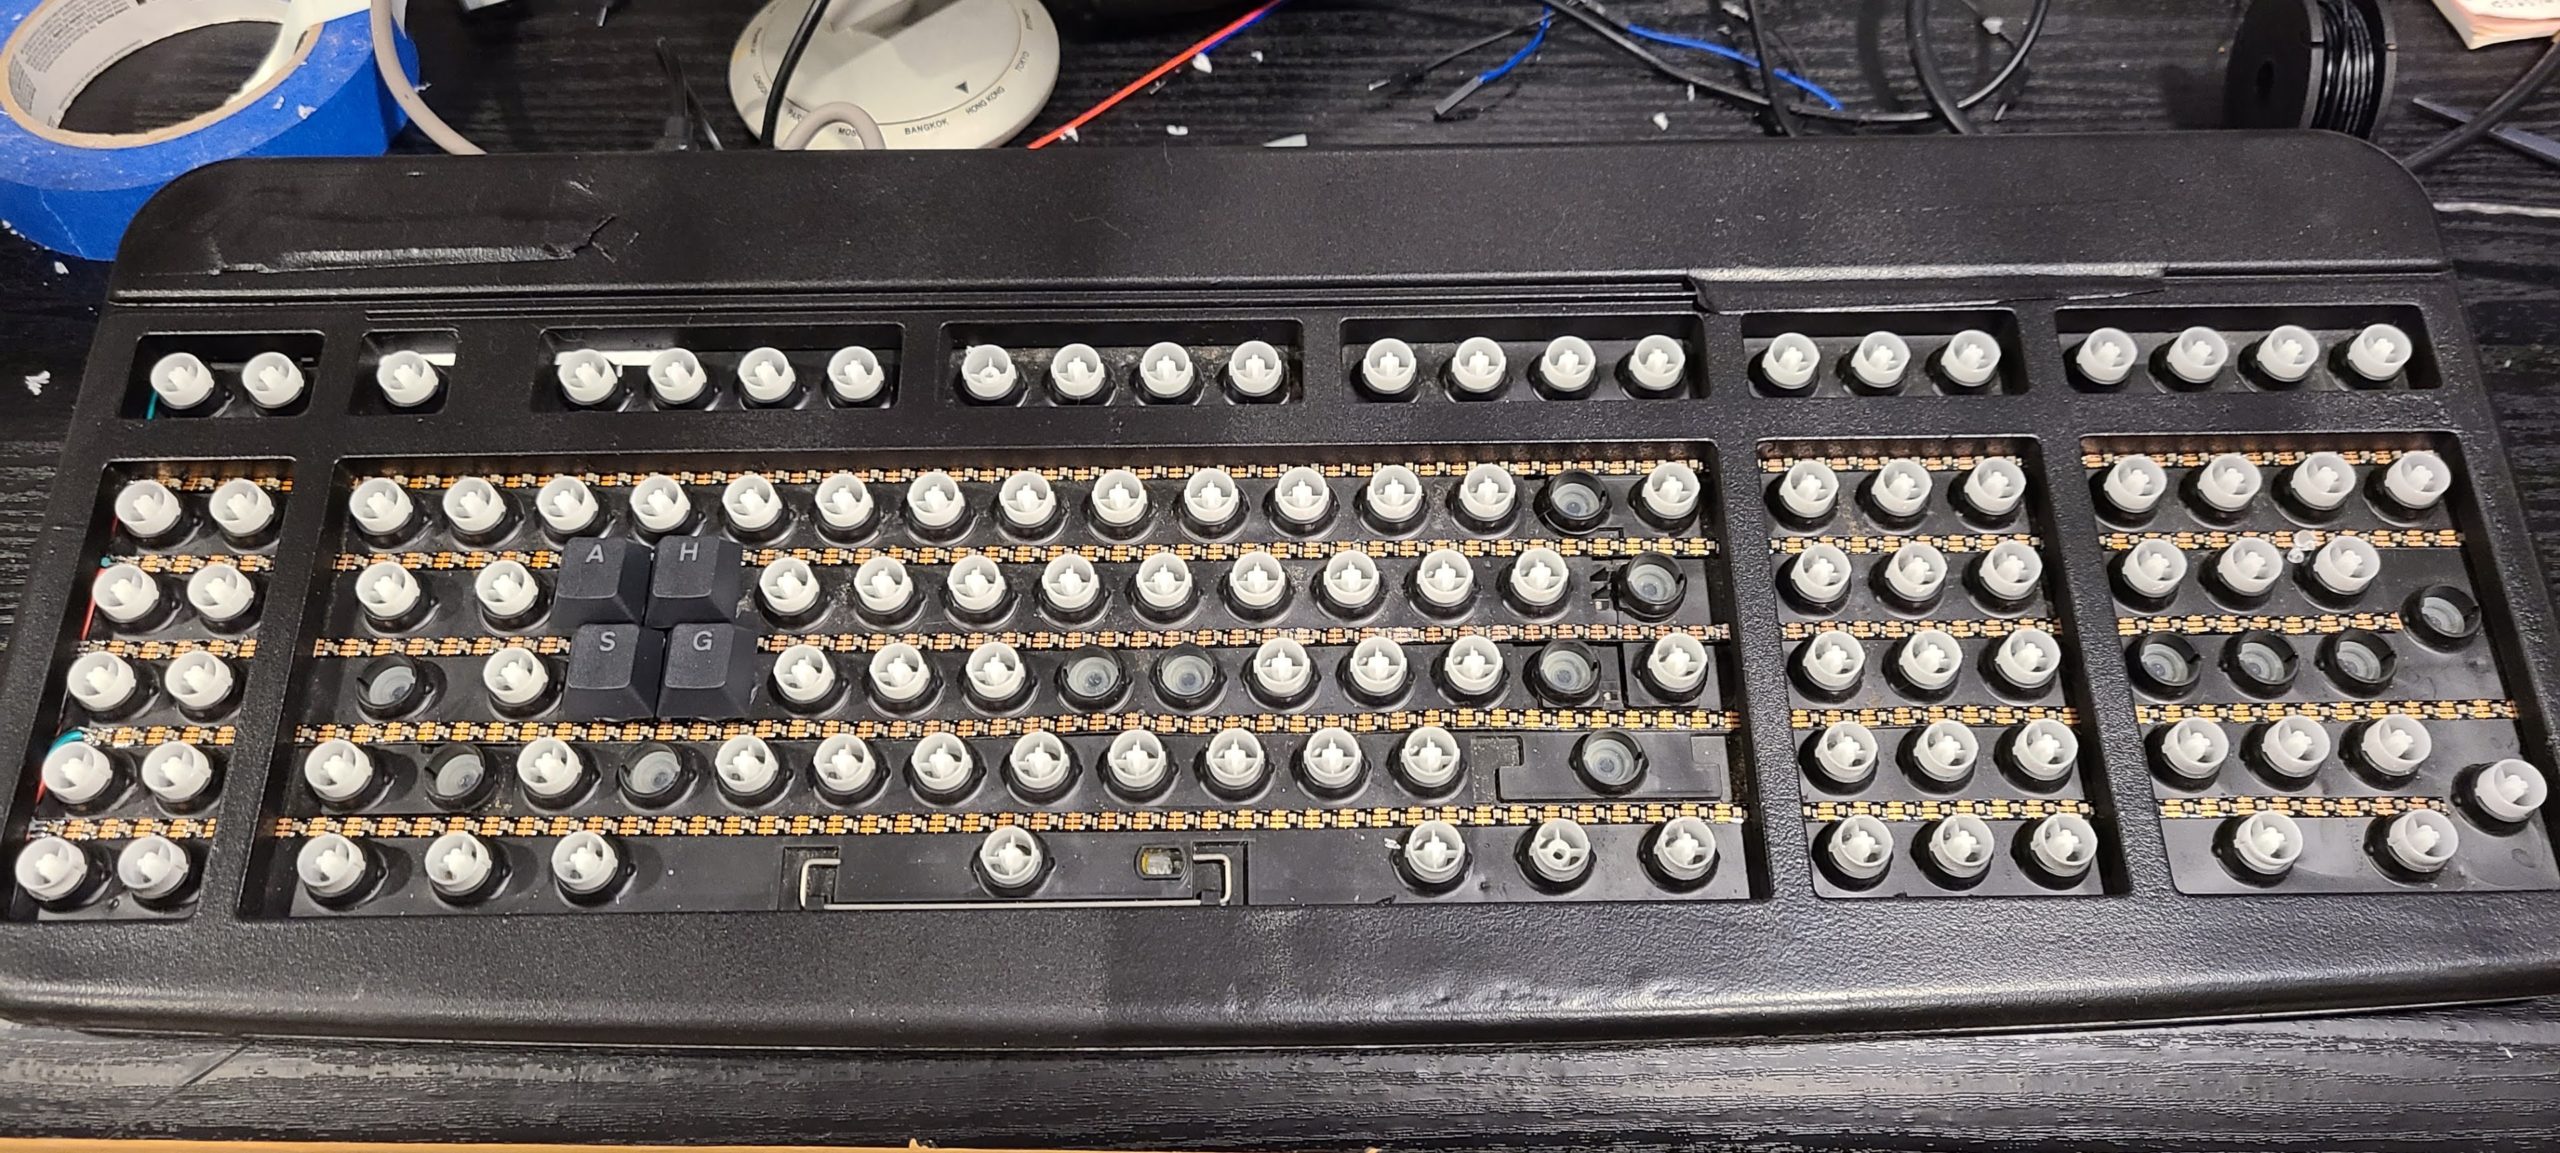
I spent a while looking for some very thin RGB led strips that were narrow enough to fit between the key plungers beneath the keys, and have such a low profile that keypresses wouldn’t be impeded by the leds themselves.
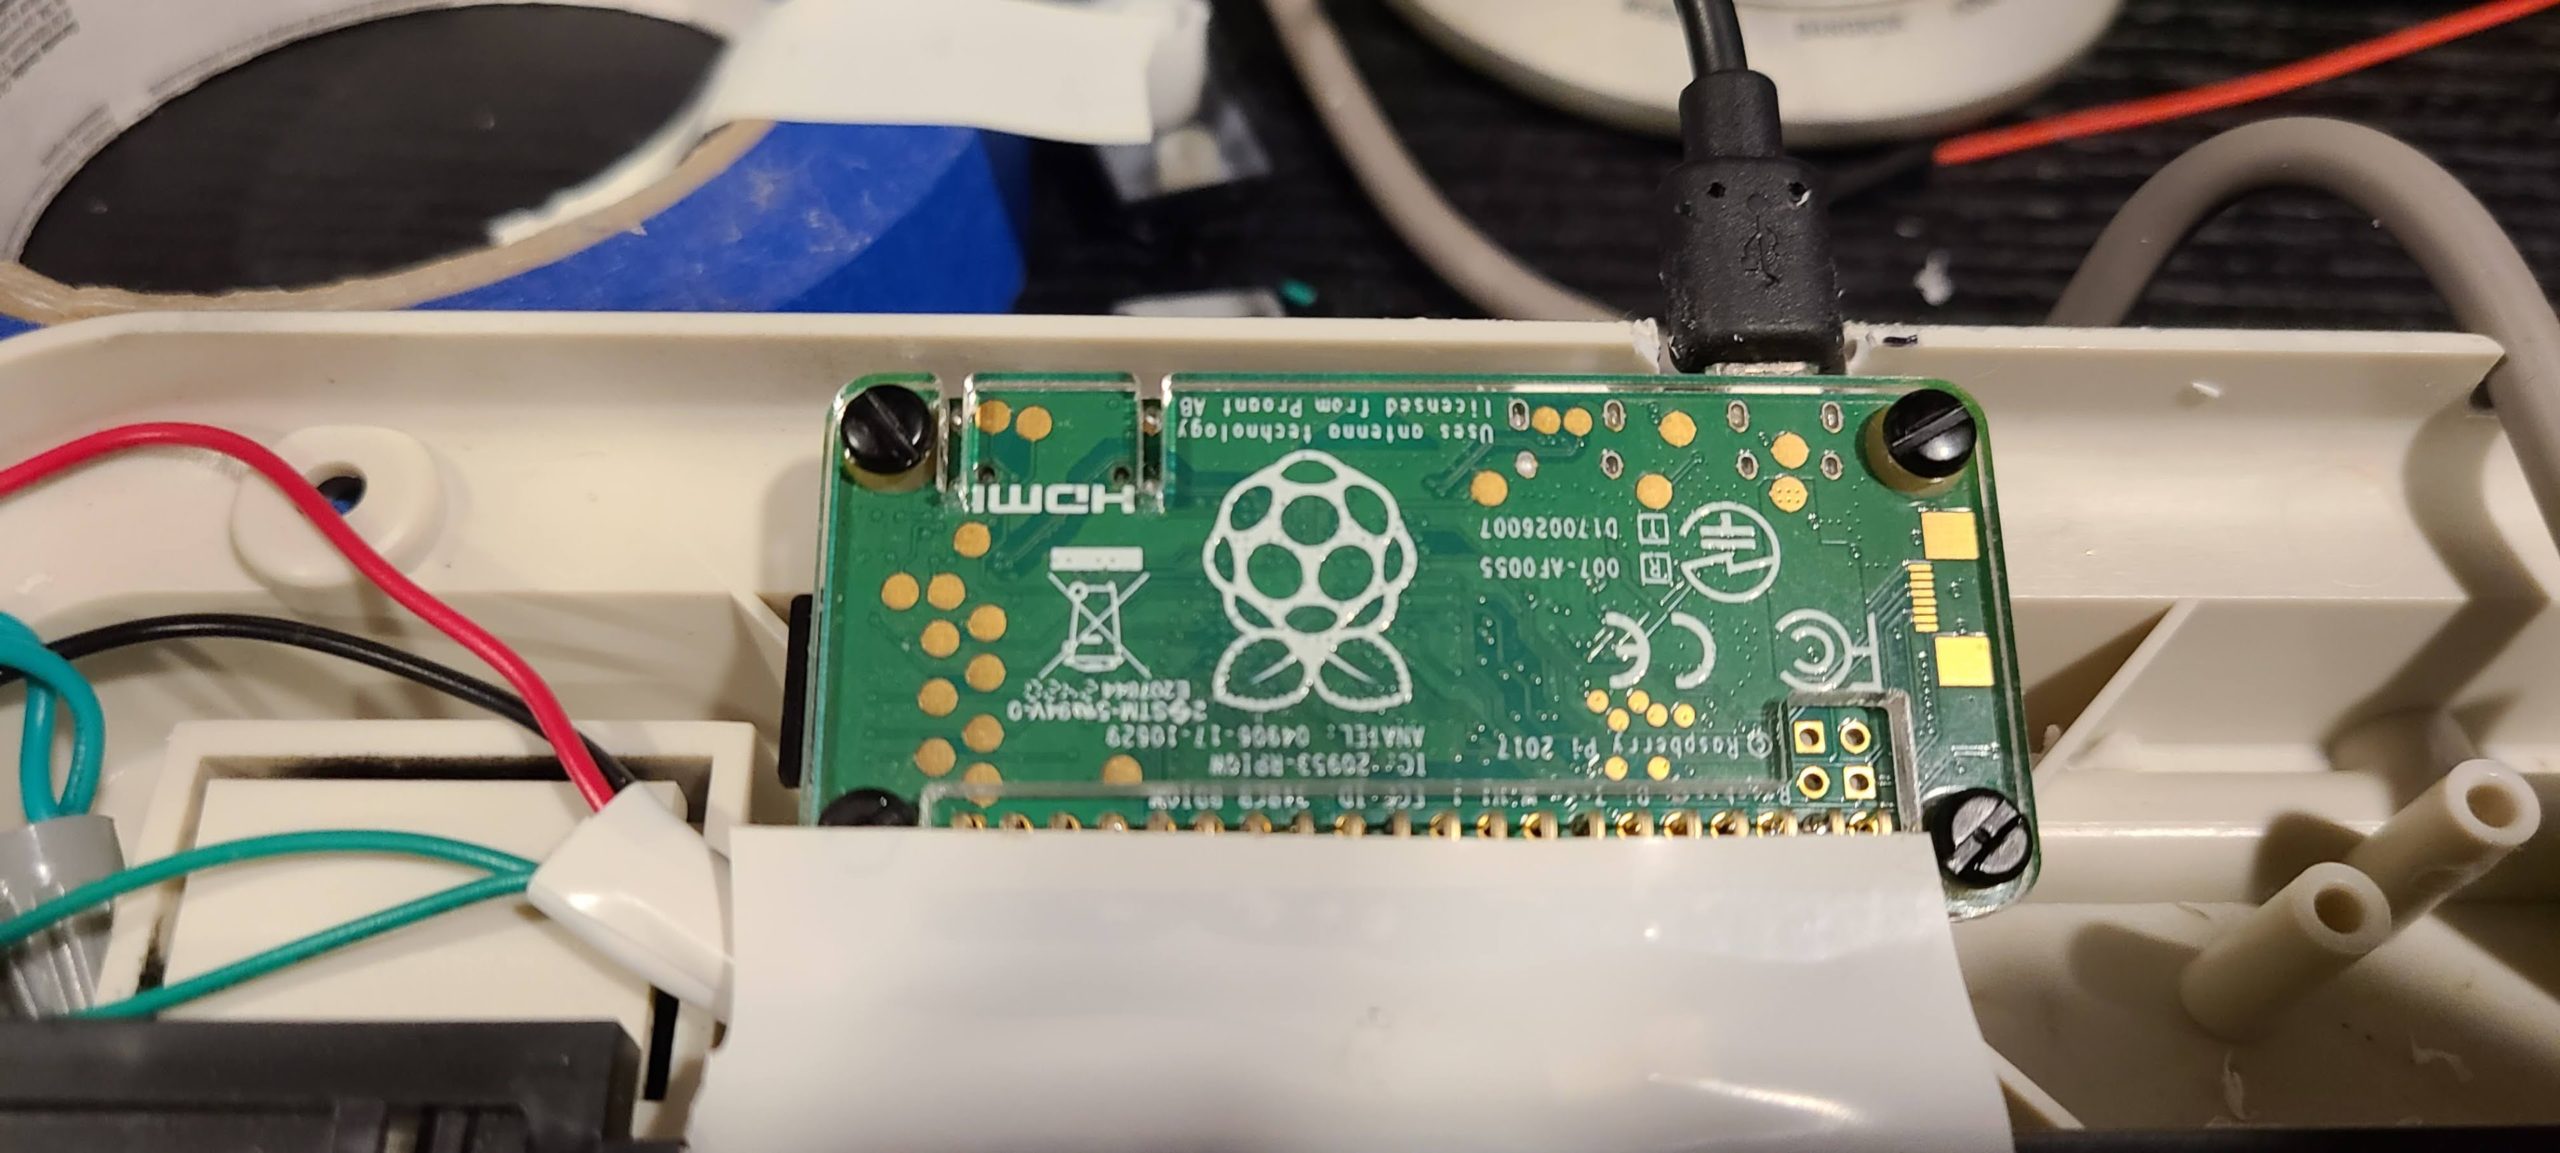
I found Adafruit.com which sold the perfect led strip (https://www.adafruit.com/product/4368) that was programmable and controllable with a Raspberry Pi board, of which I had two.
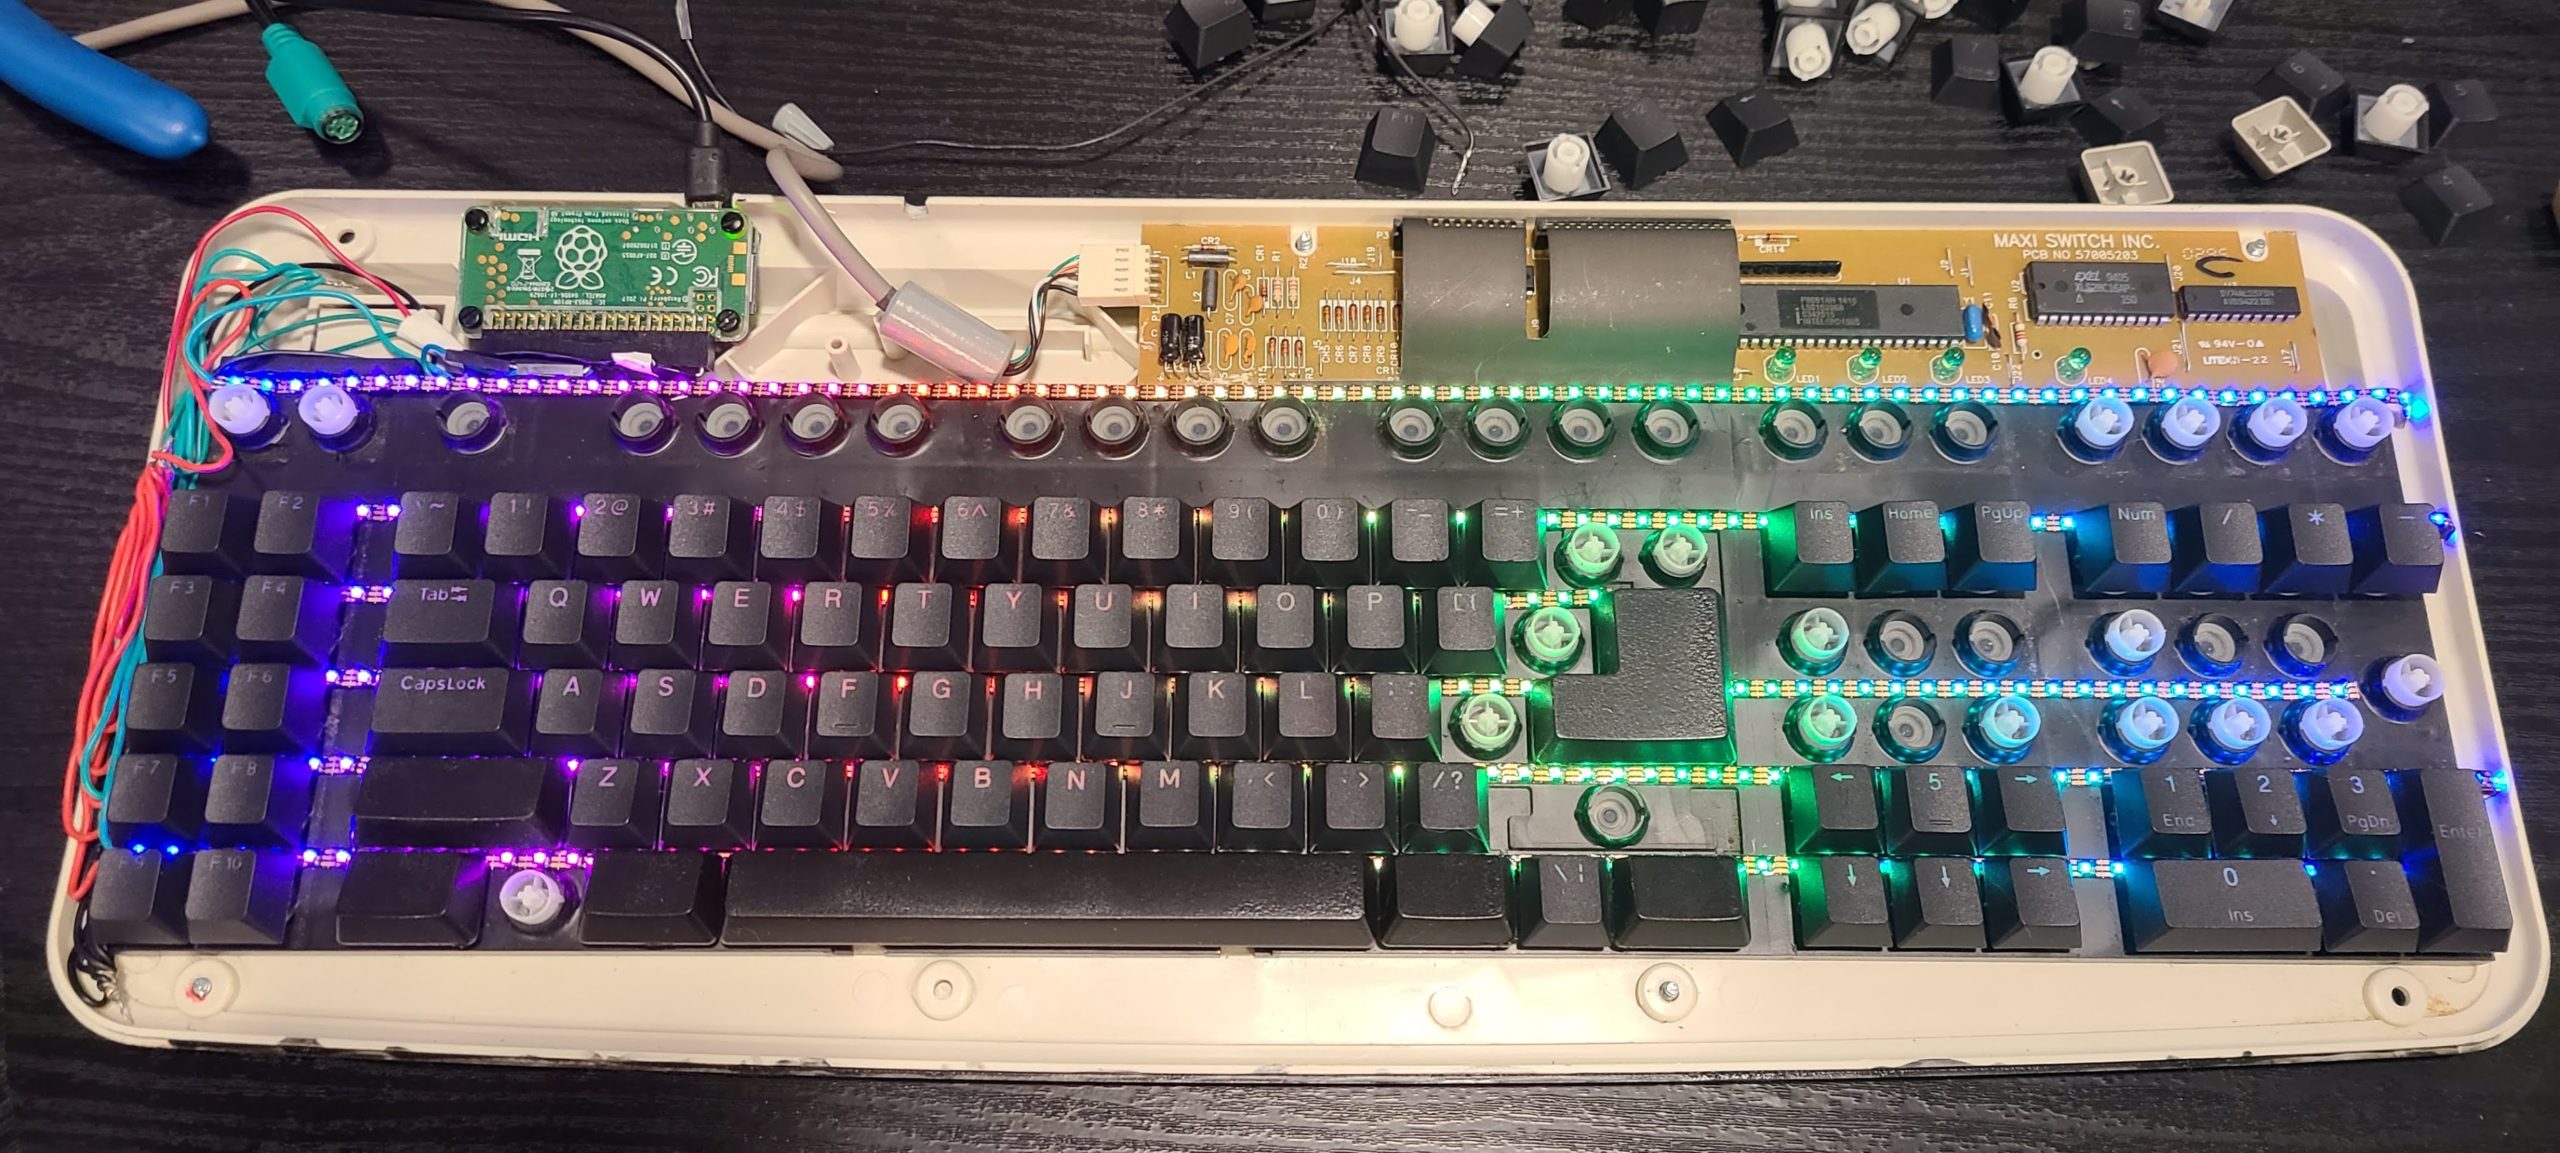
Using my Pi board I was able to do a proof-of-concept that an rgb led strip could be powered and programmed directly from the board’s pinouts without any extra power inputs, power switchings, stepdown processing, etc.
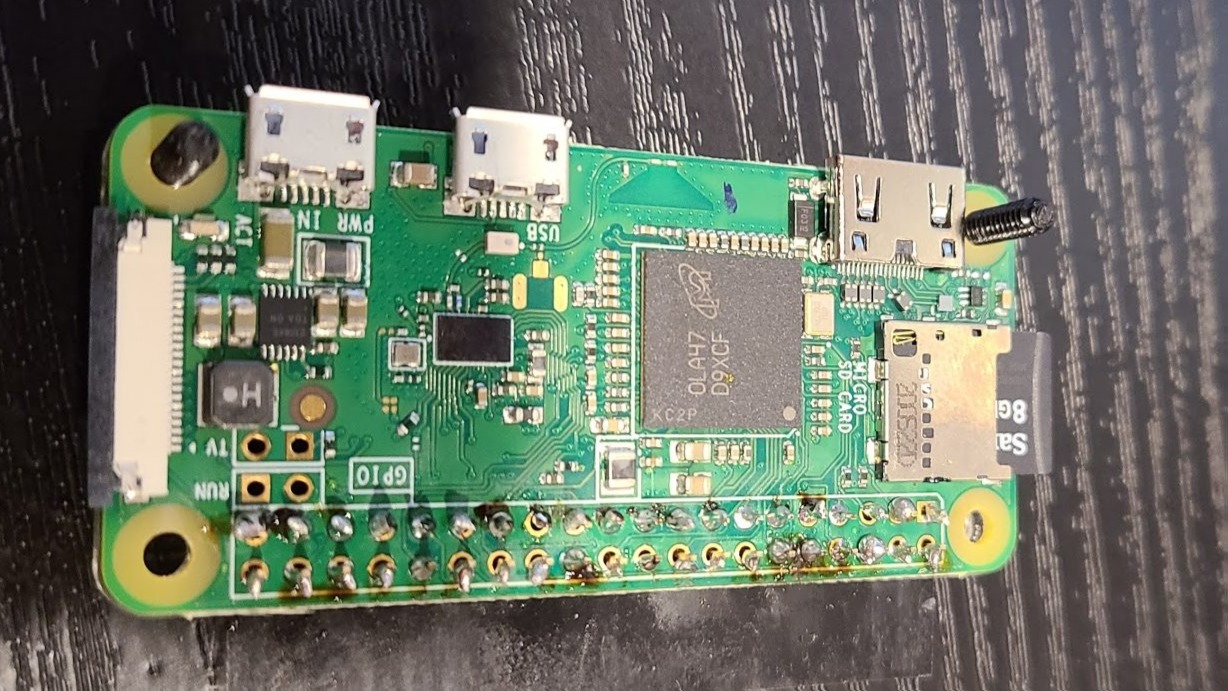
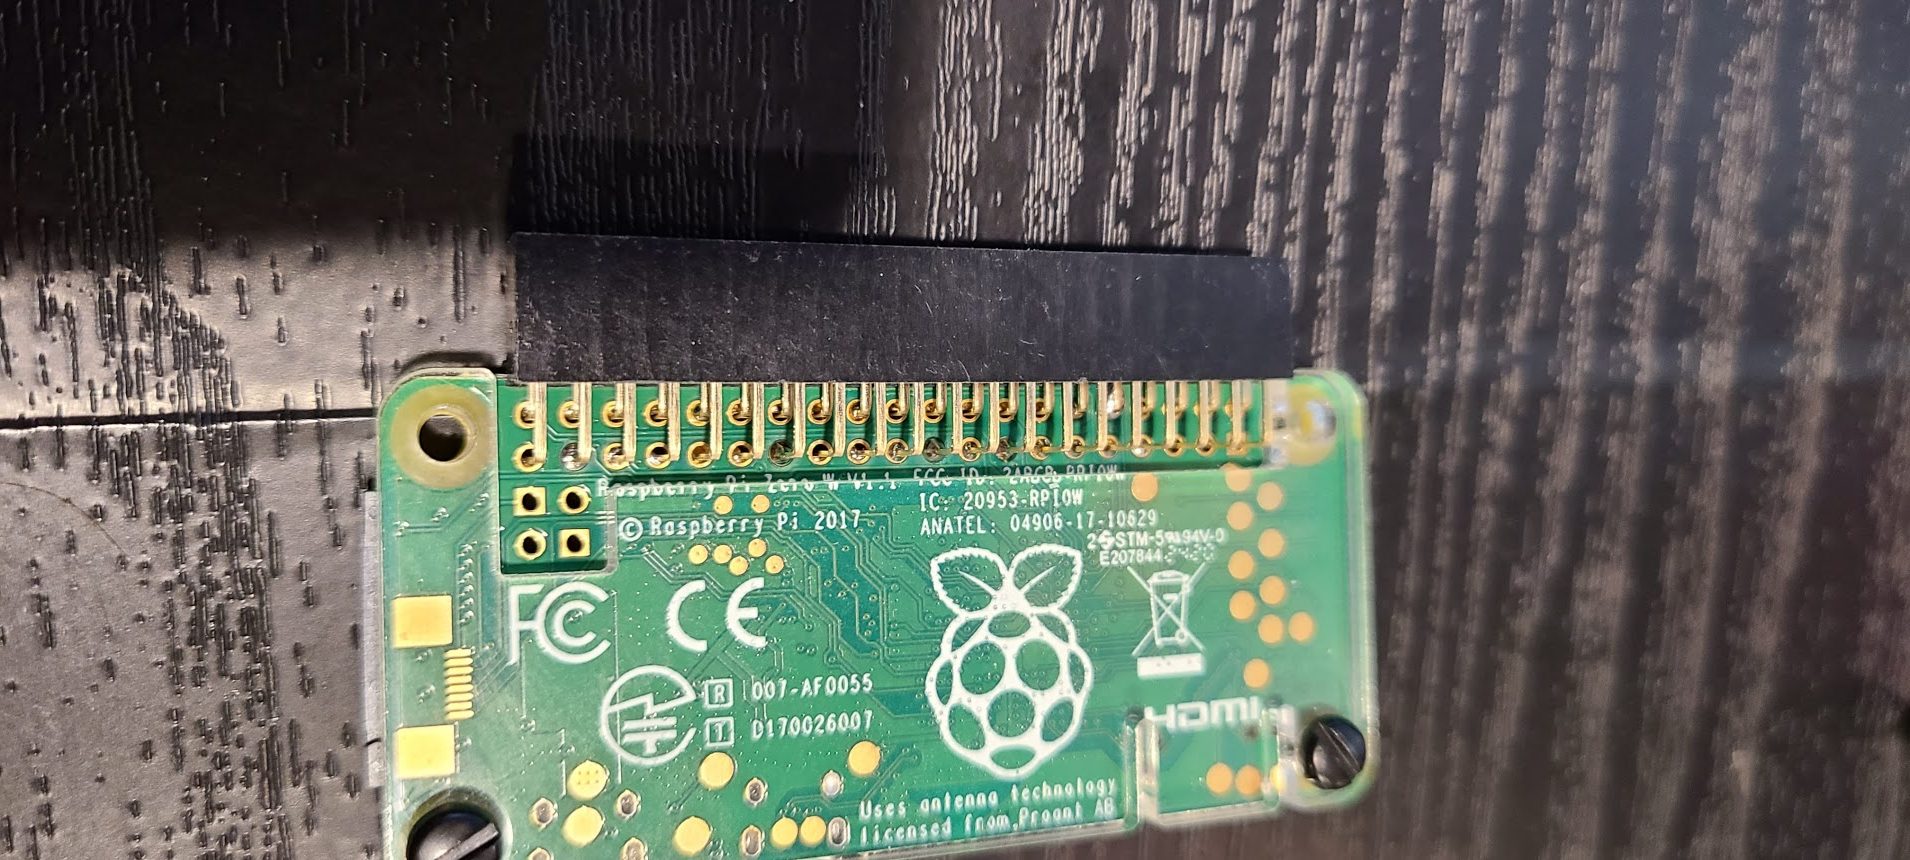
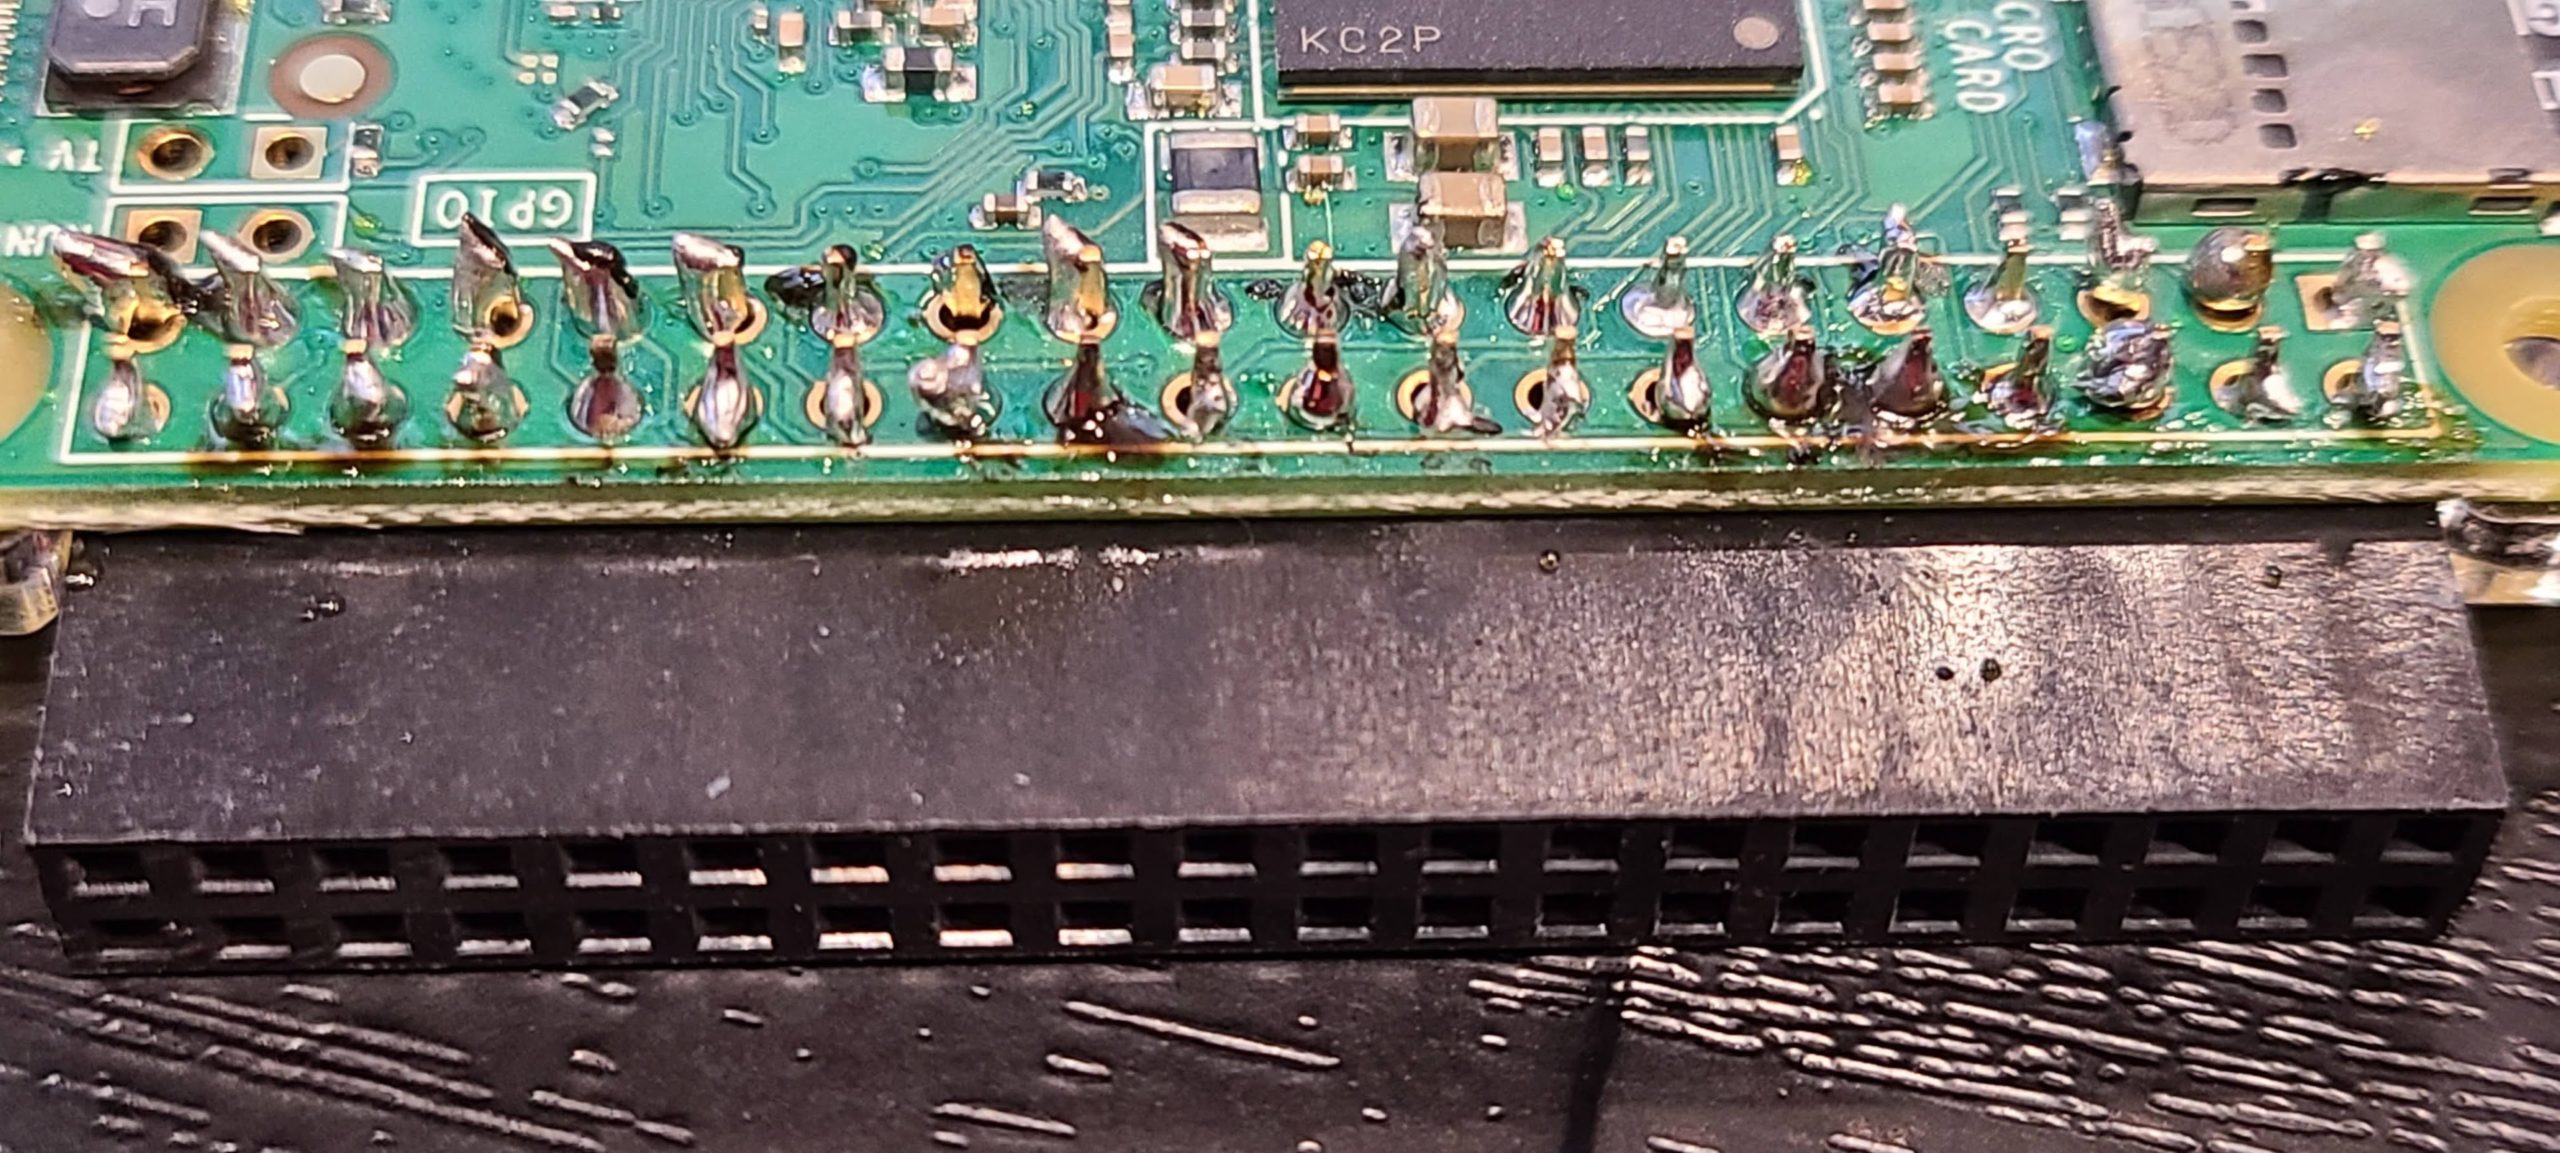
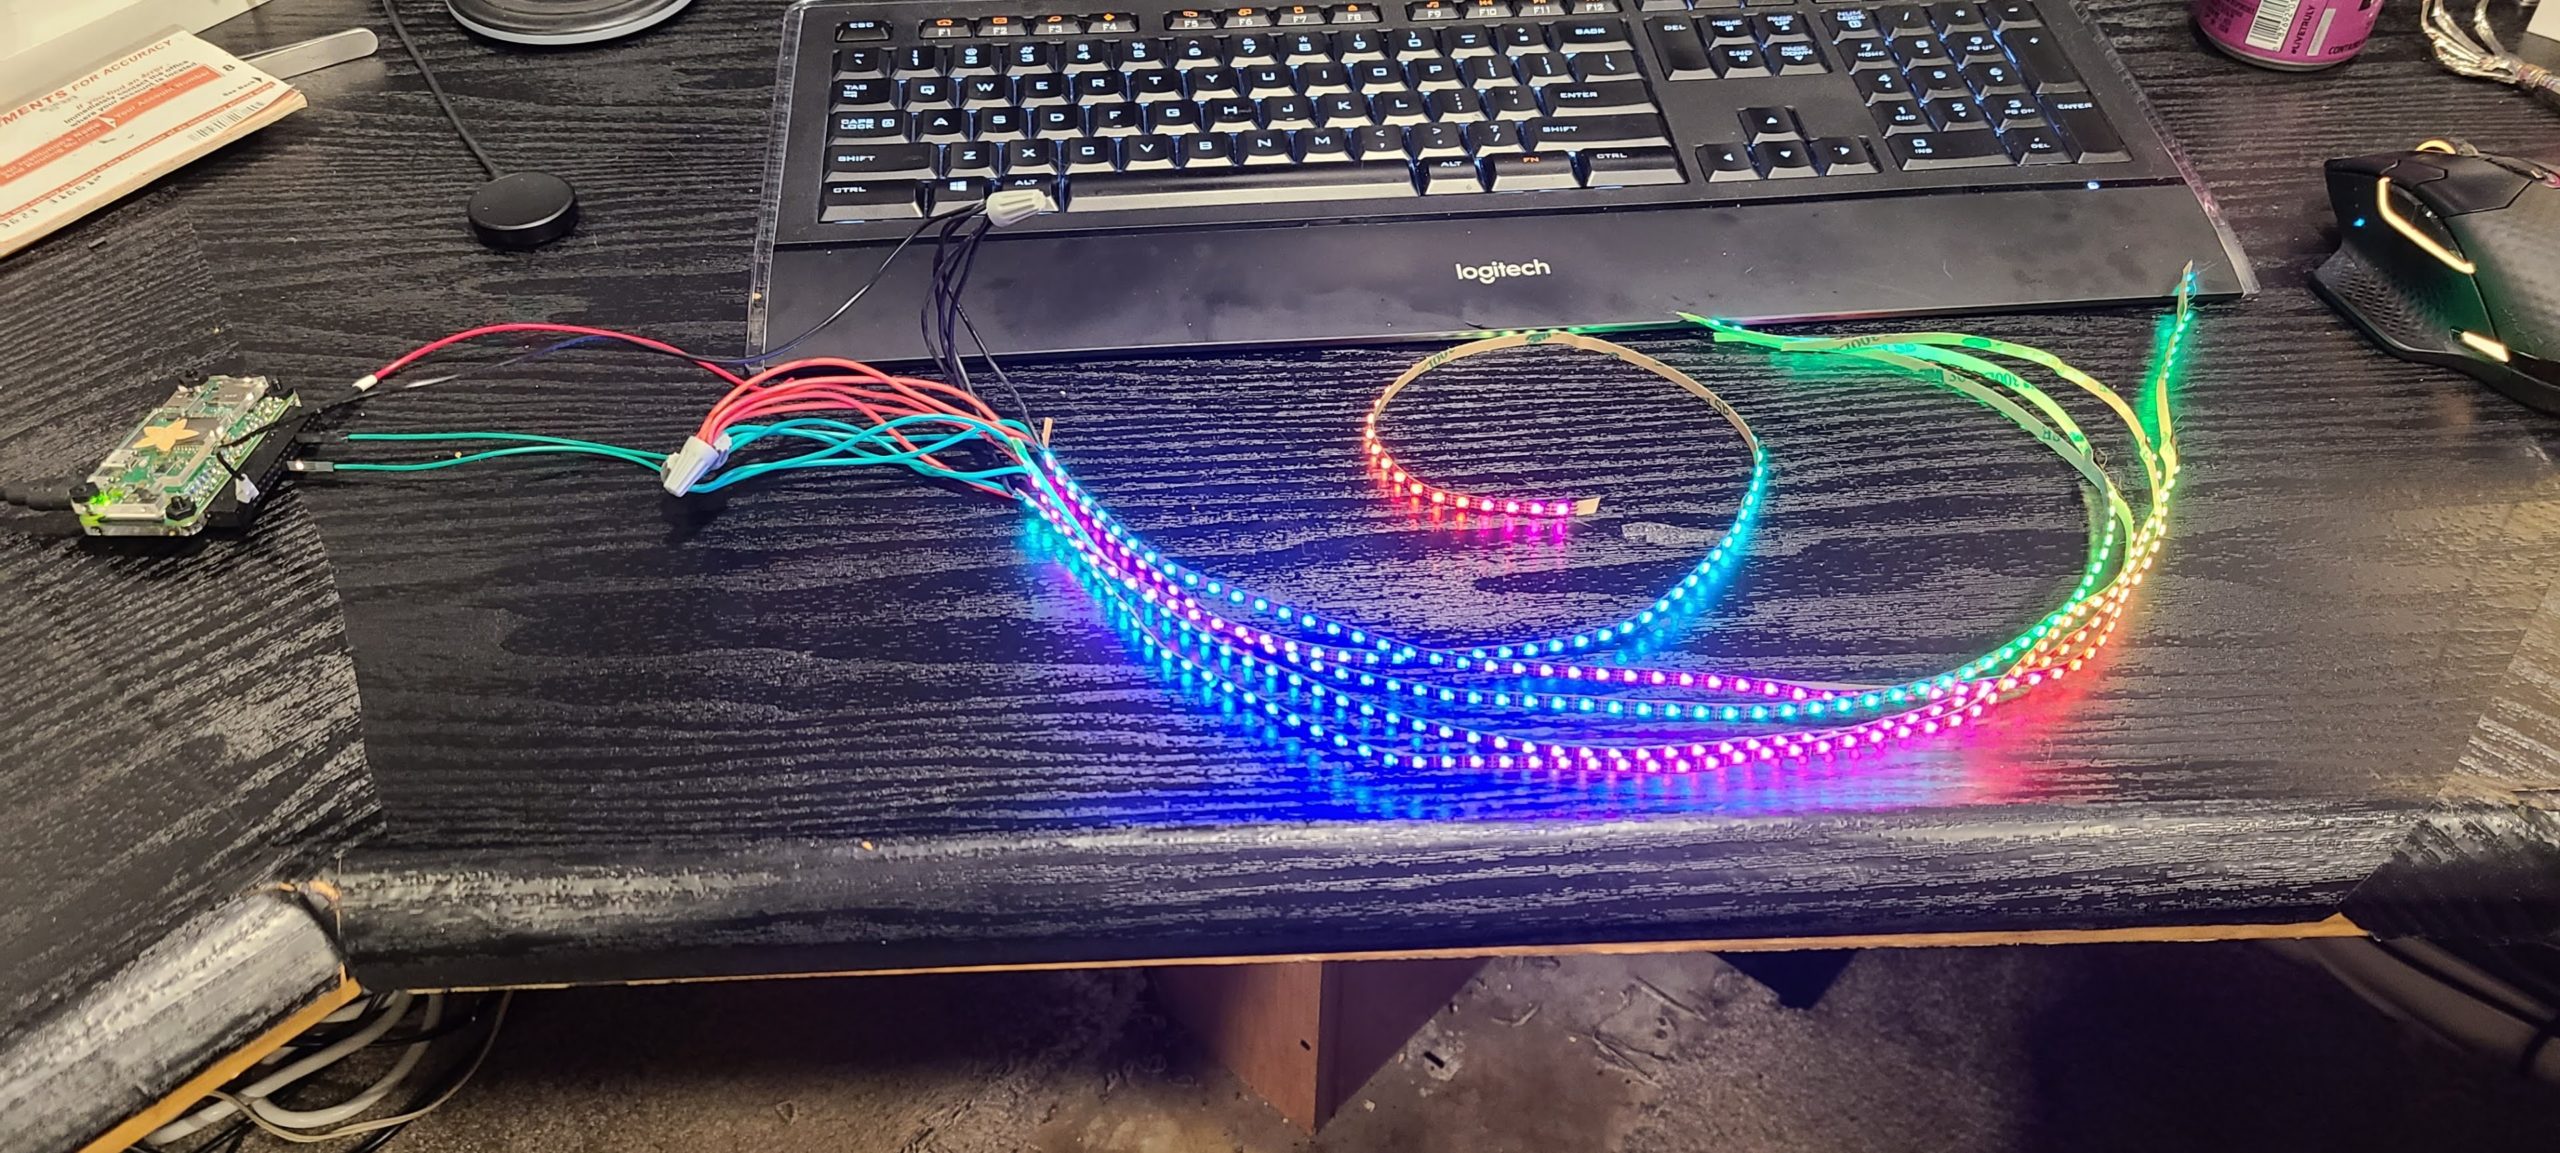
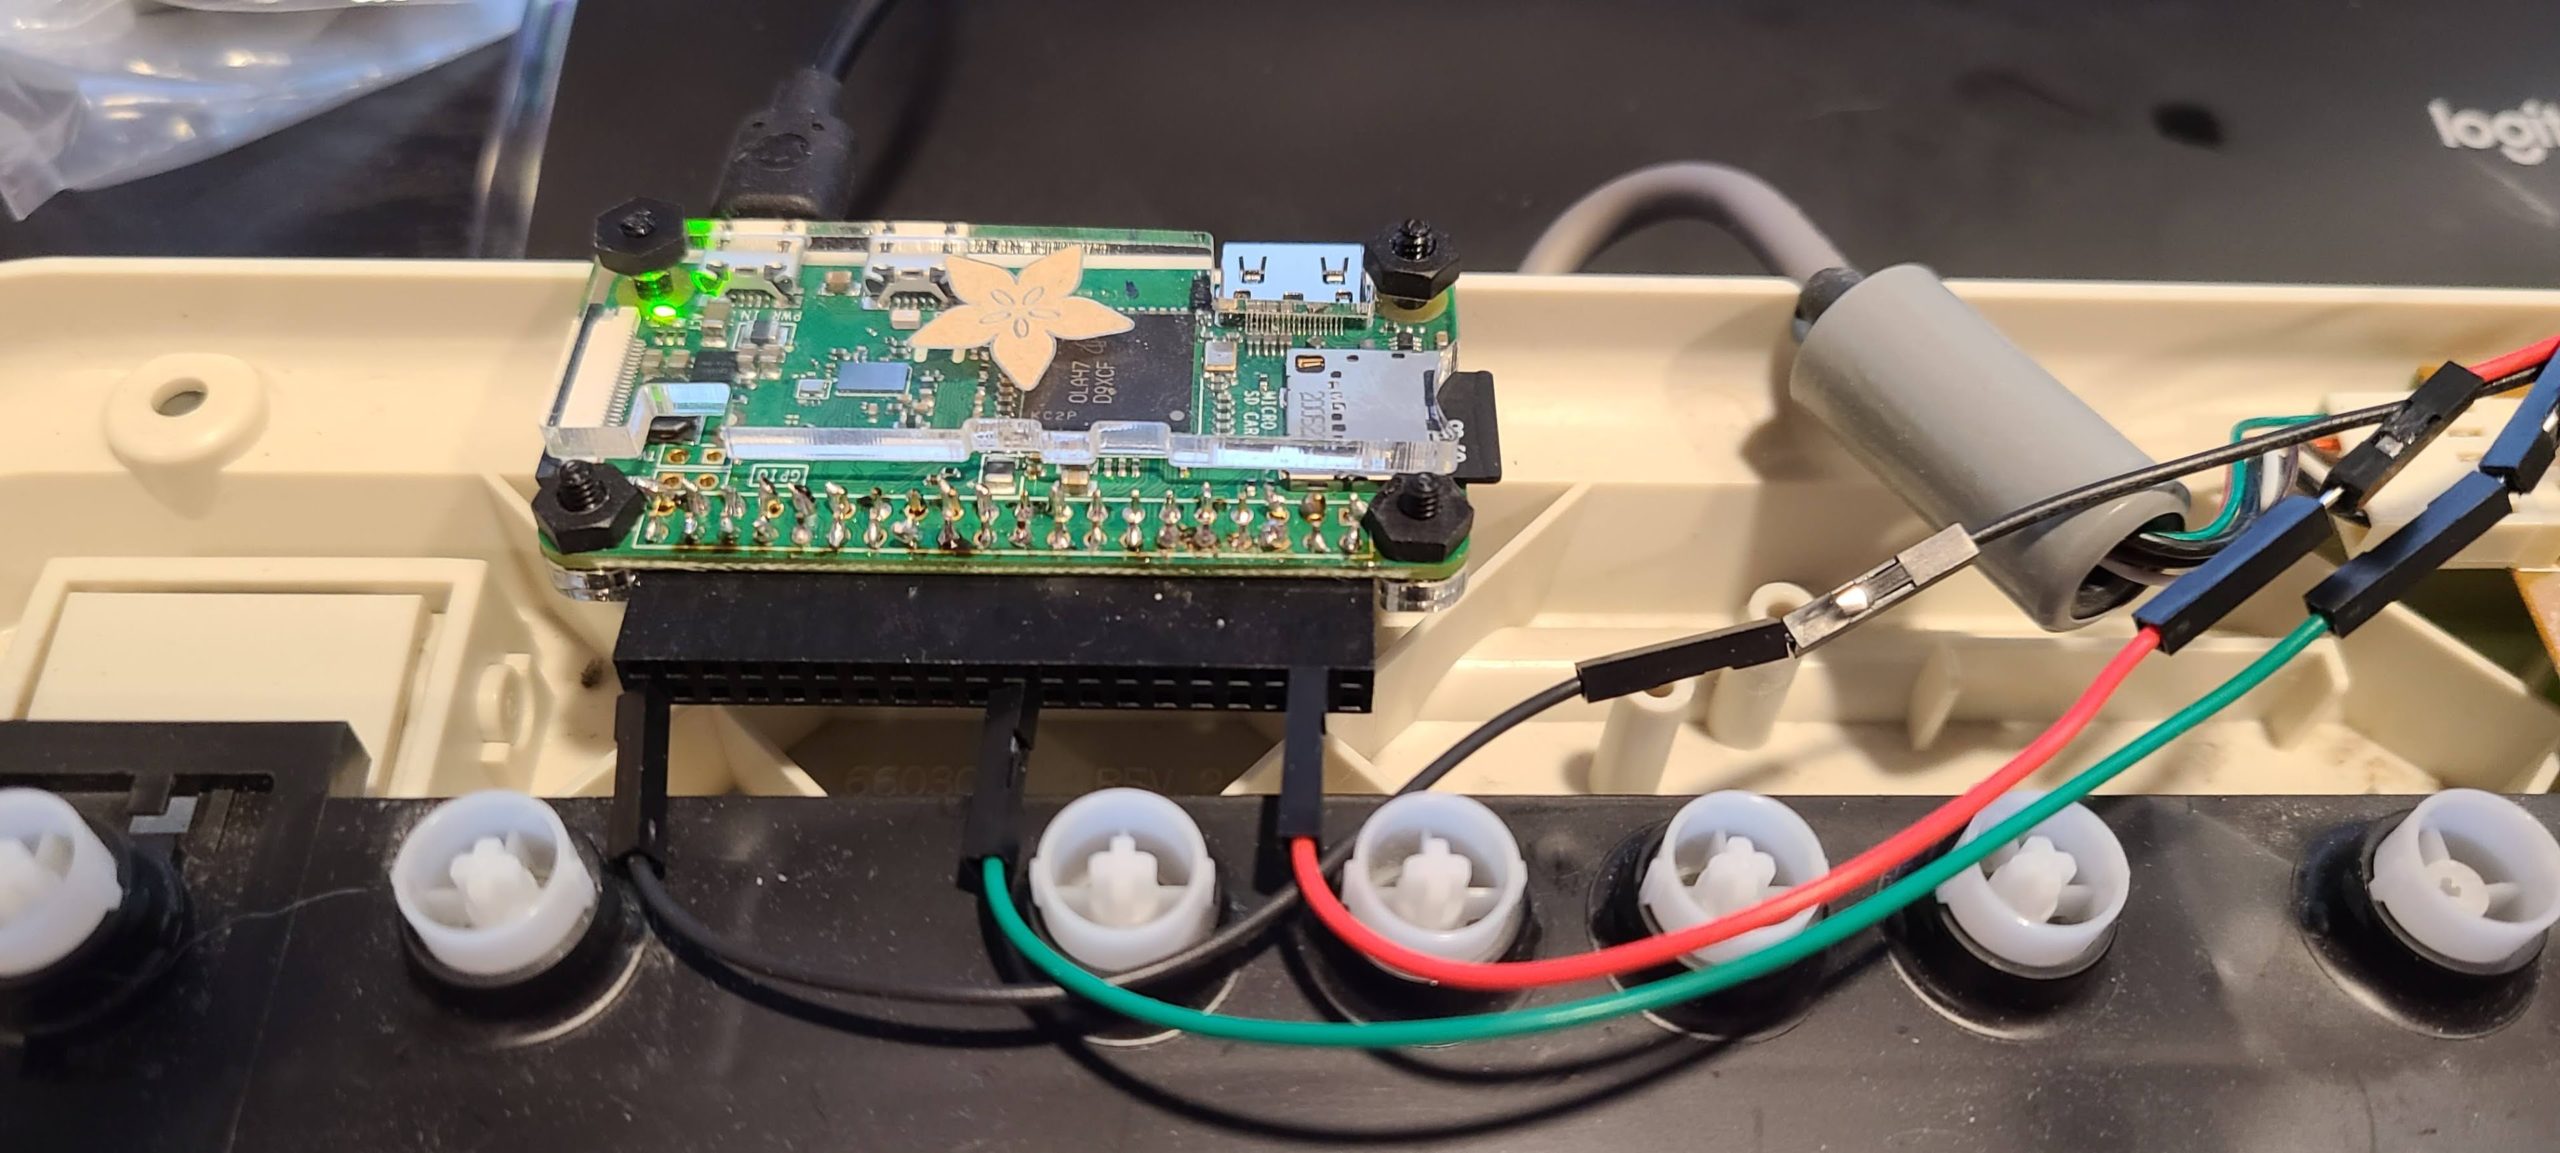
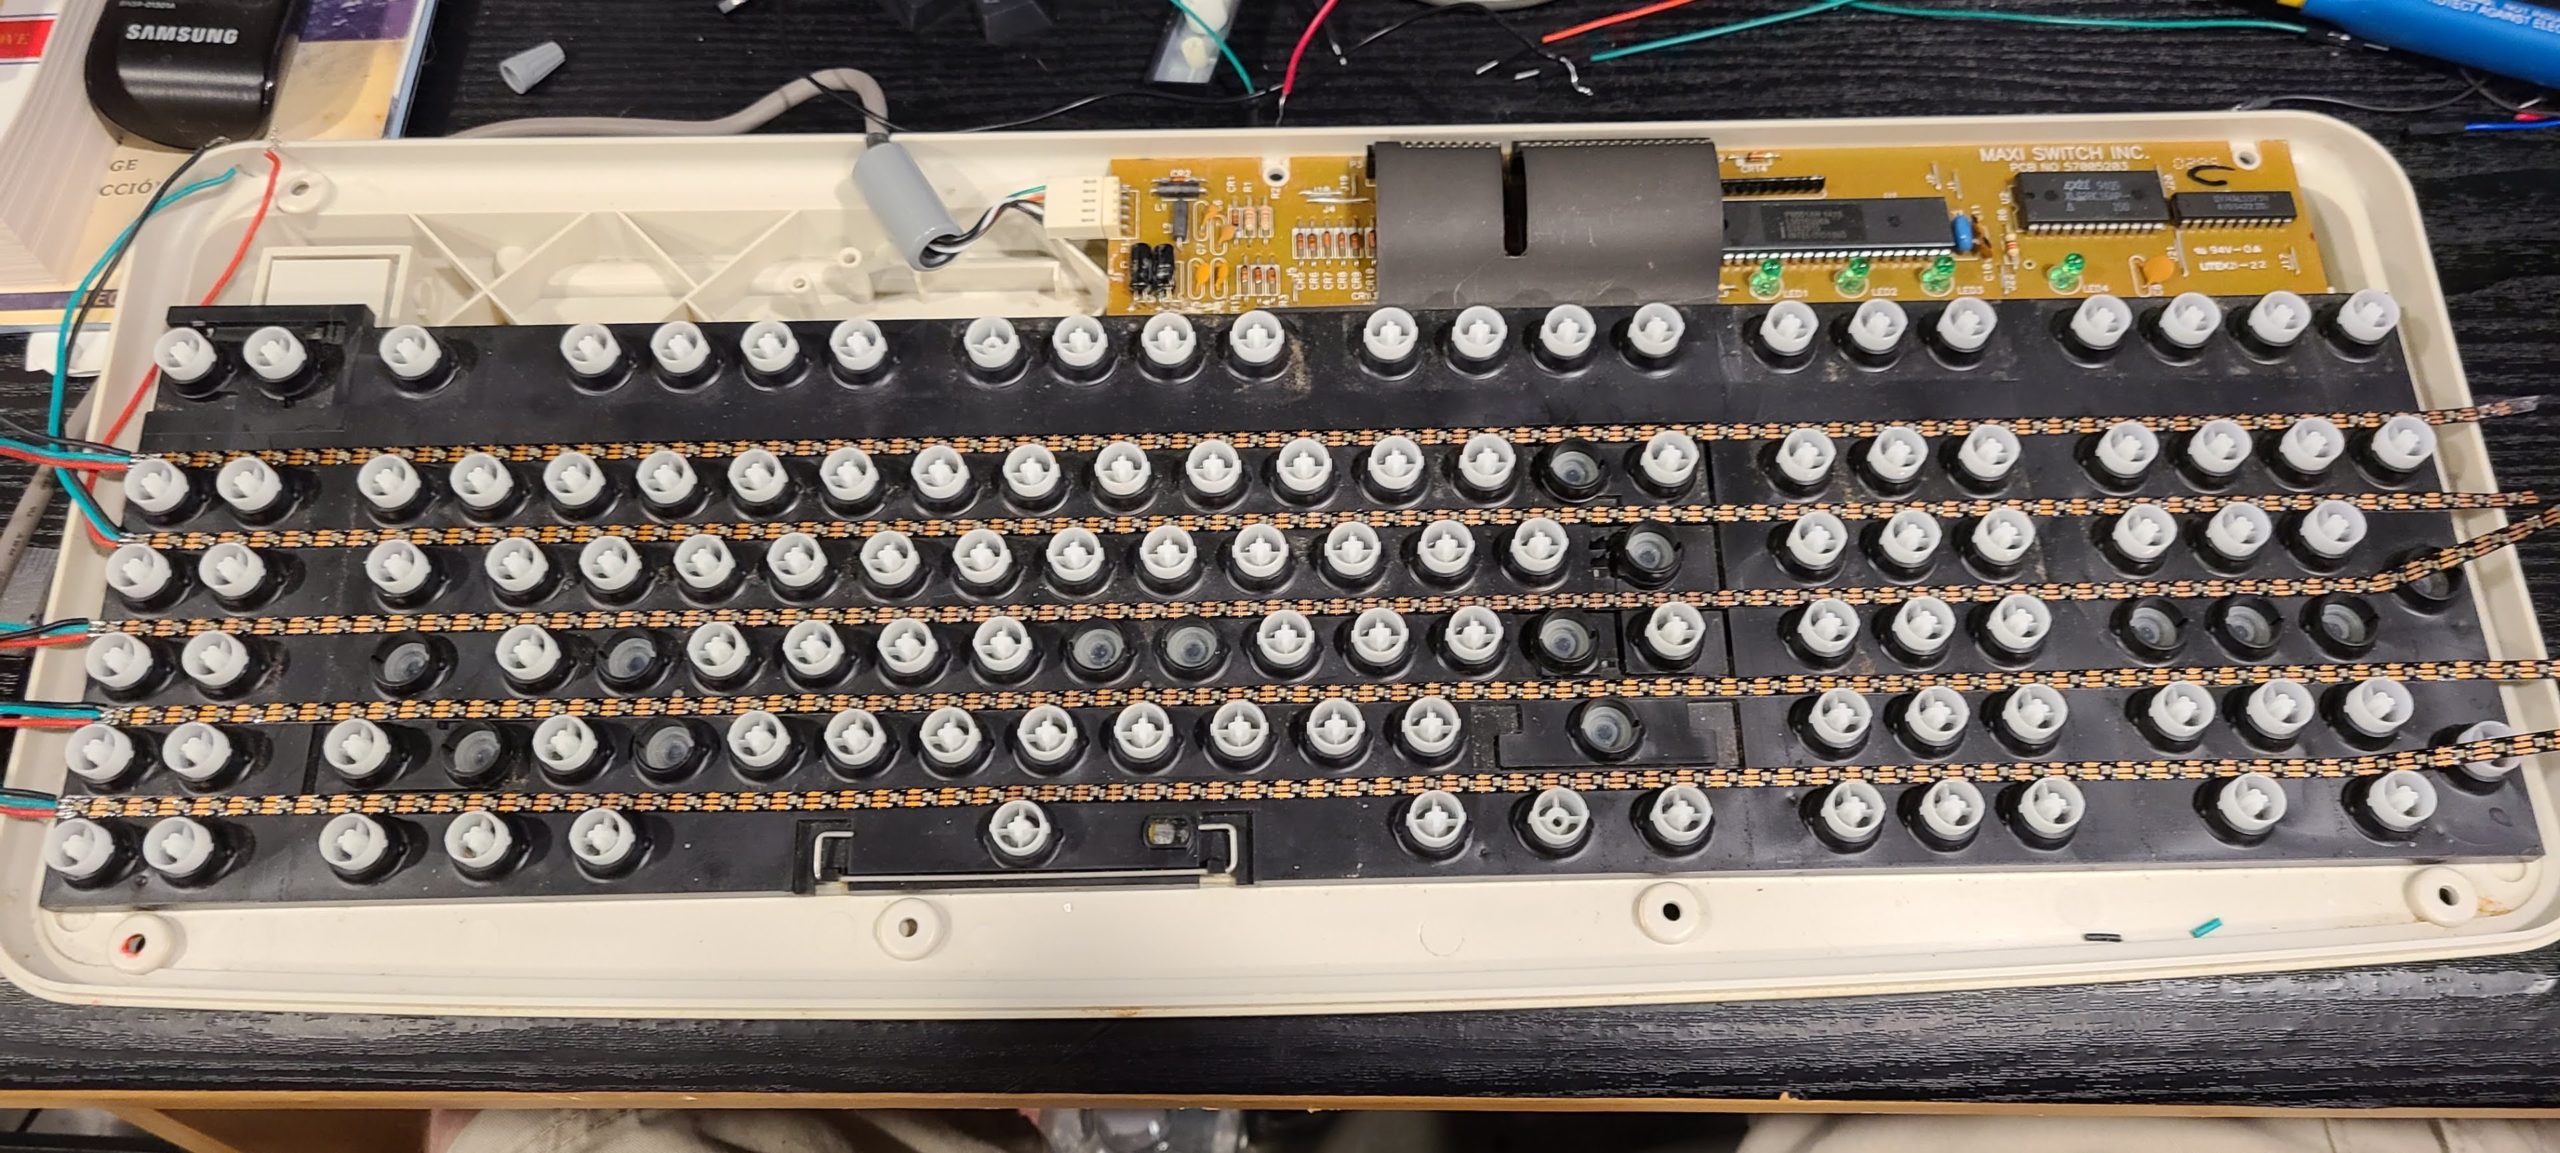
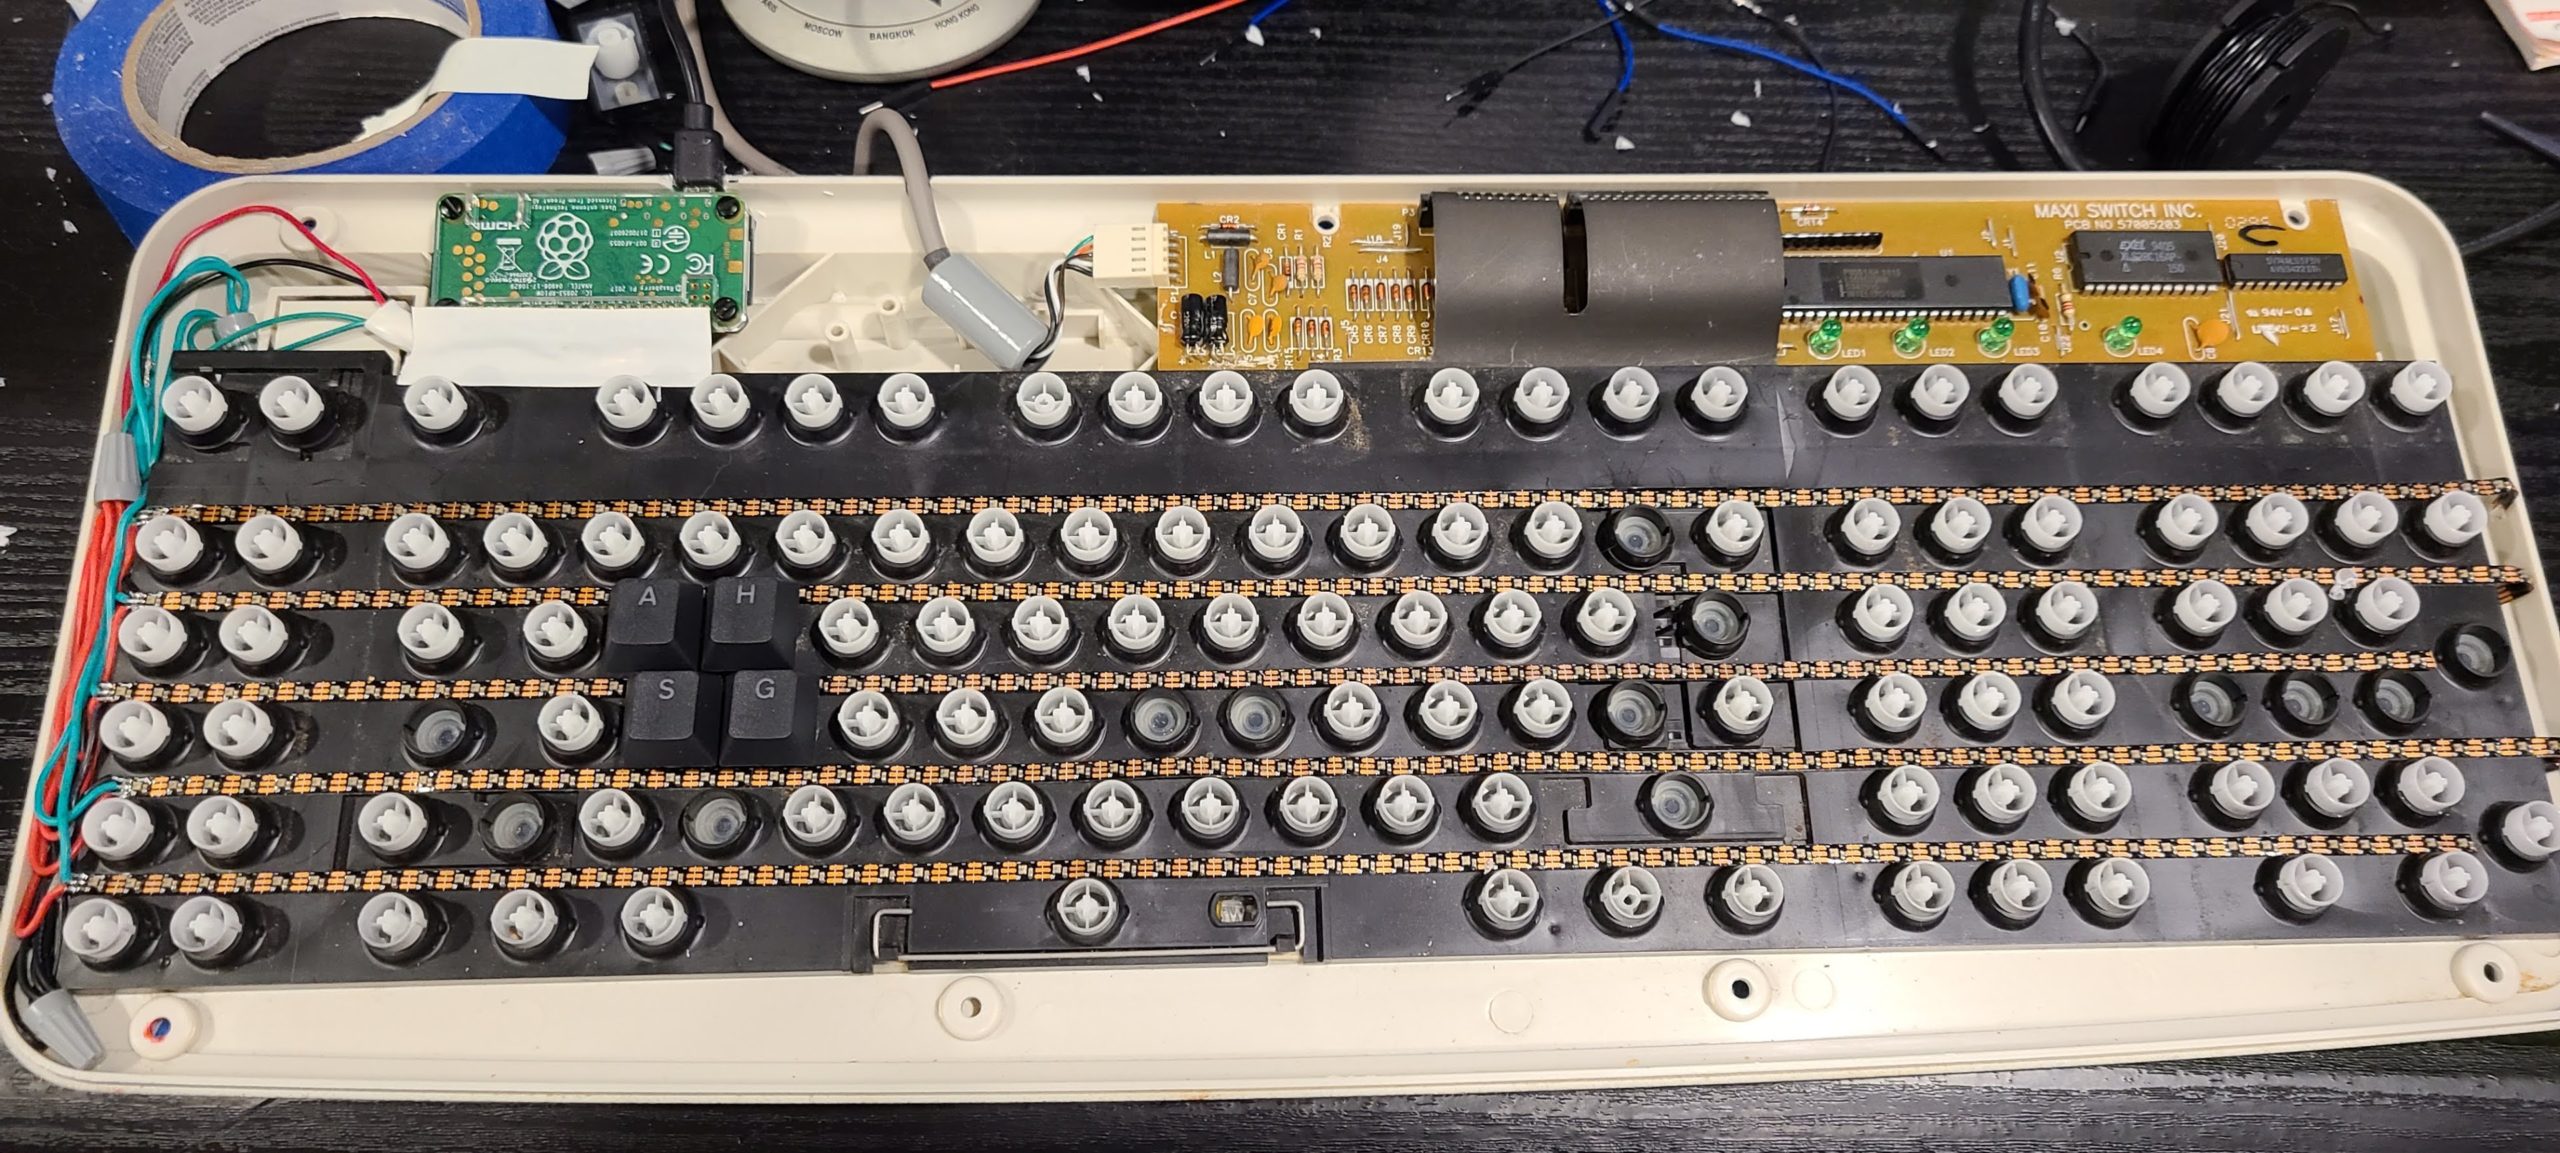
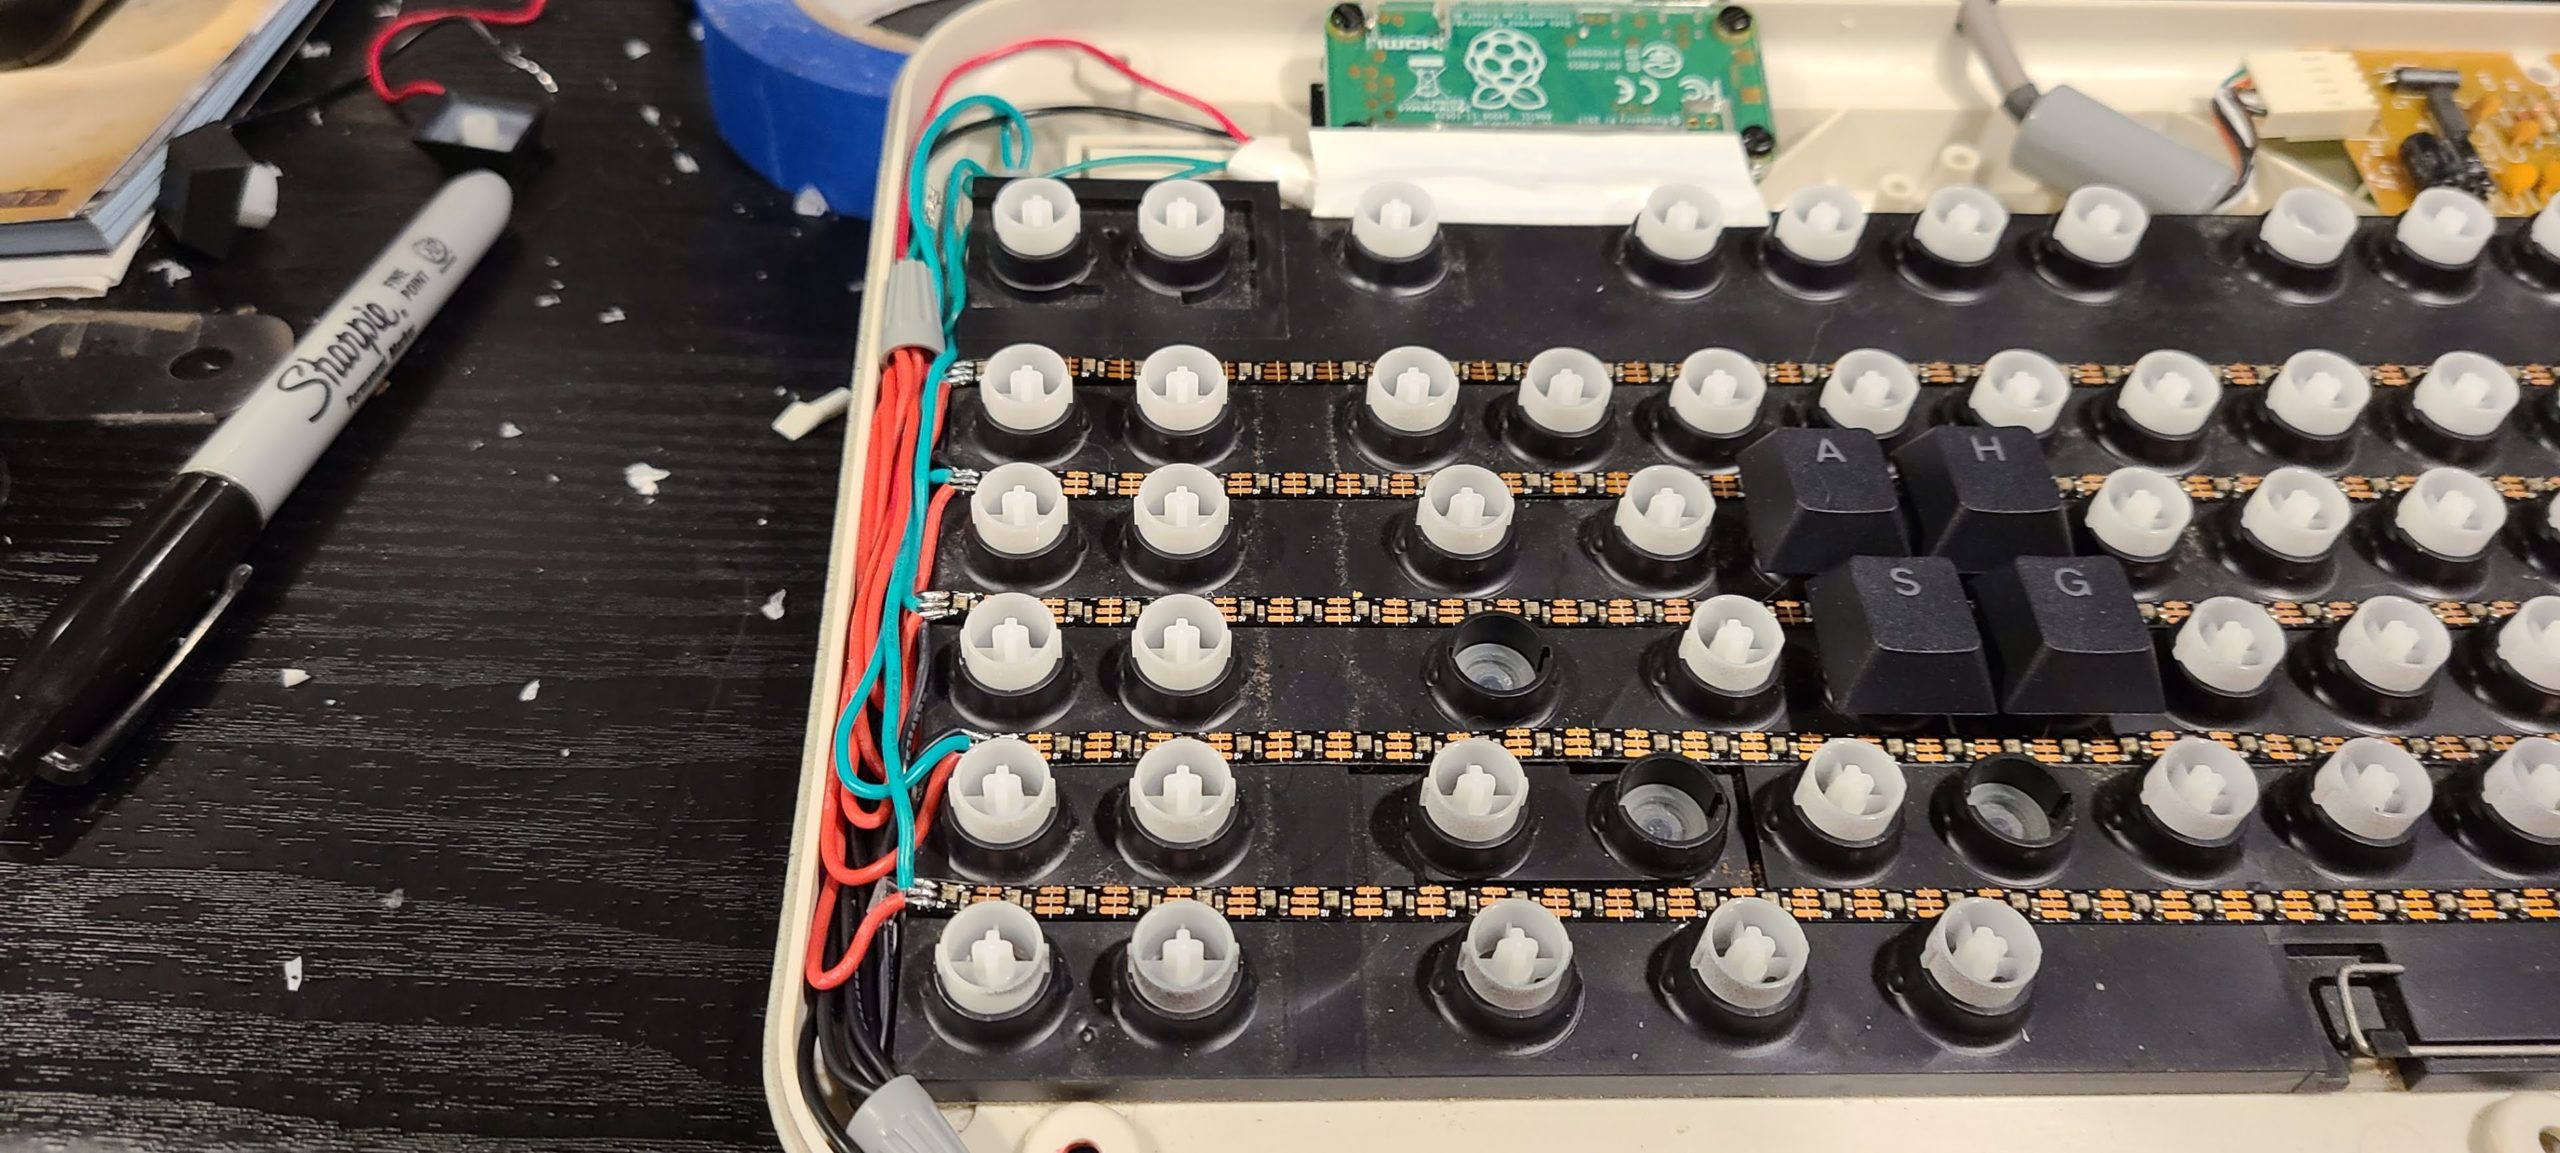
The next step was to miniaturize the setup so it could reside within the keyboard. I found the Pi Zero board which is still an SBC which has all of the functionality sans most of the ports, and in a much smaller form factor. Best of all, the pinouts are identical to the full sized Pi boards, so the wiring and code to run the leds wouldn’t have to change.
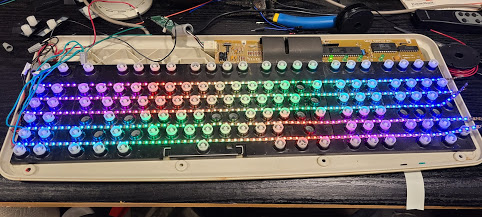
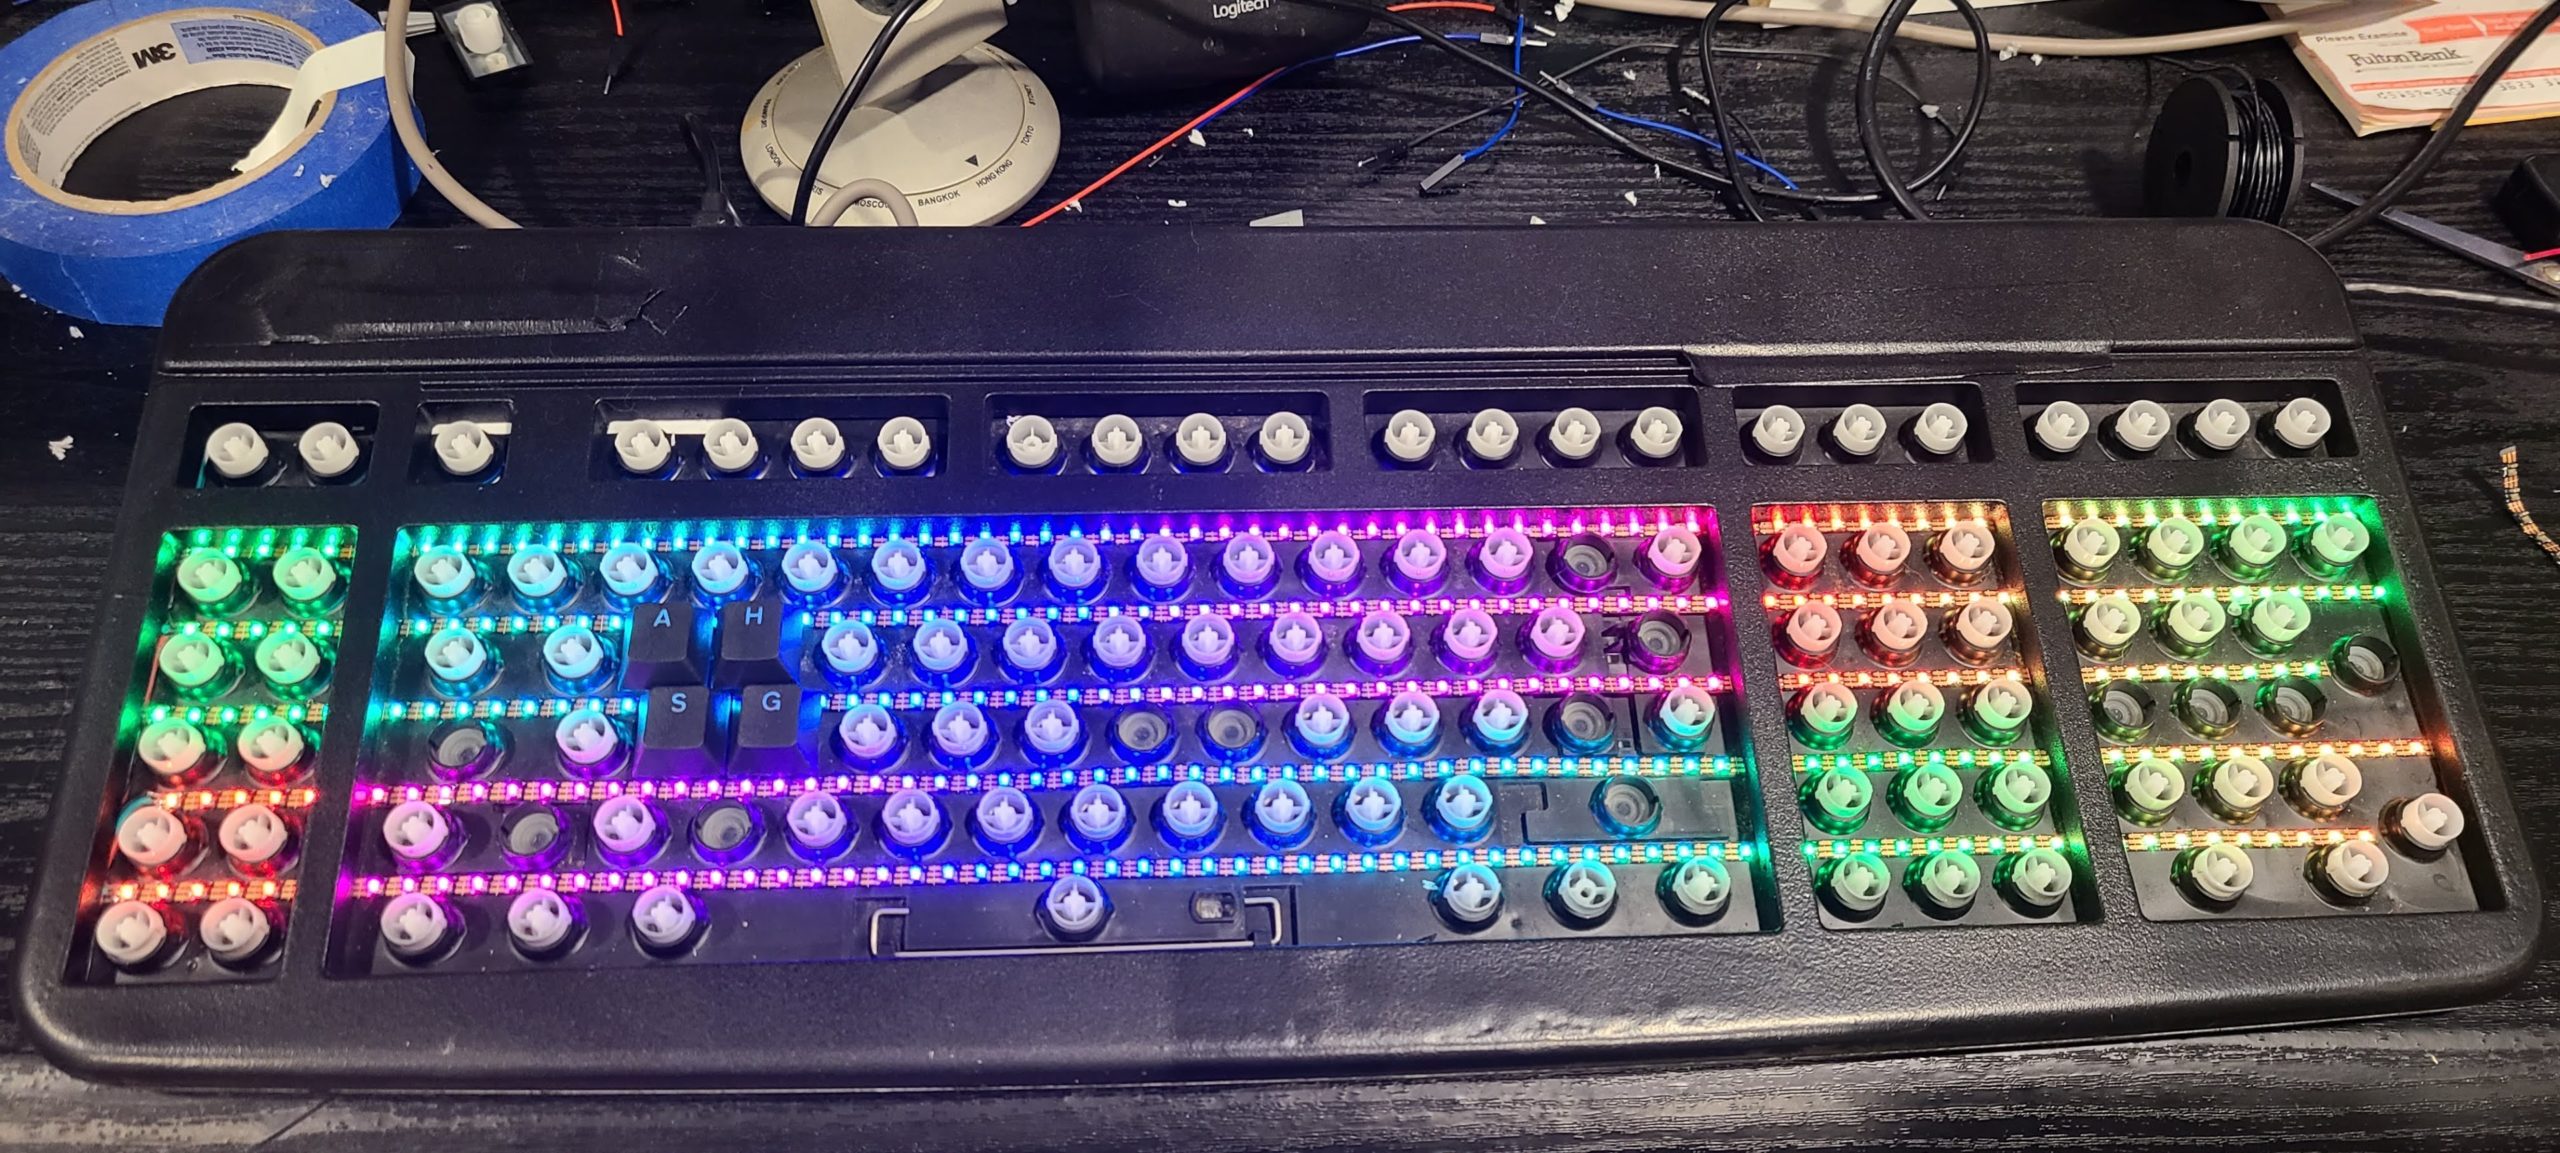
I bought a small female header and soldered it to the pinout circuits and added a few more led strips to further prove out this was going to be a feasible project. Eventually I ended up with 5 led strips, all being powered from the Pi zero board, one to sit between each row of keys on the keyboard.
The led strips are really cool. Each one is half-a-meter in length and contains 75 fully programmable, full RGB leds, and is long enough to sit between each row of keys.
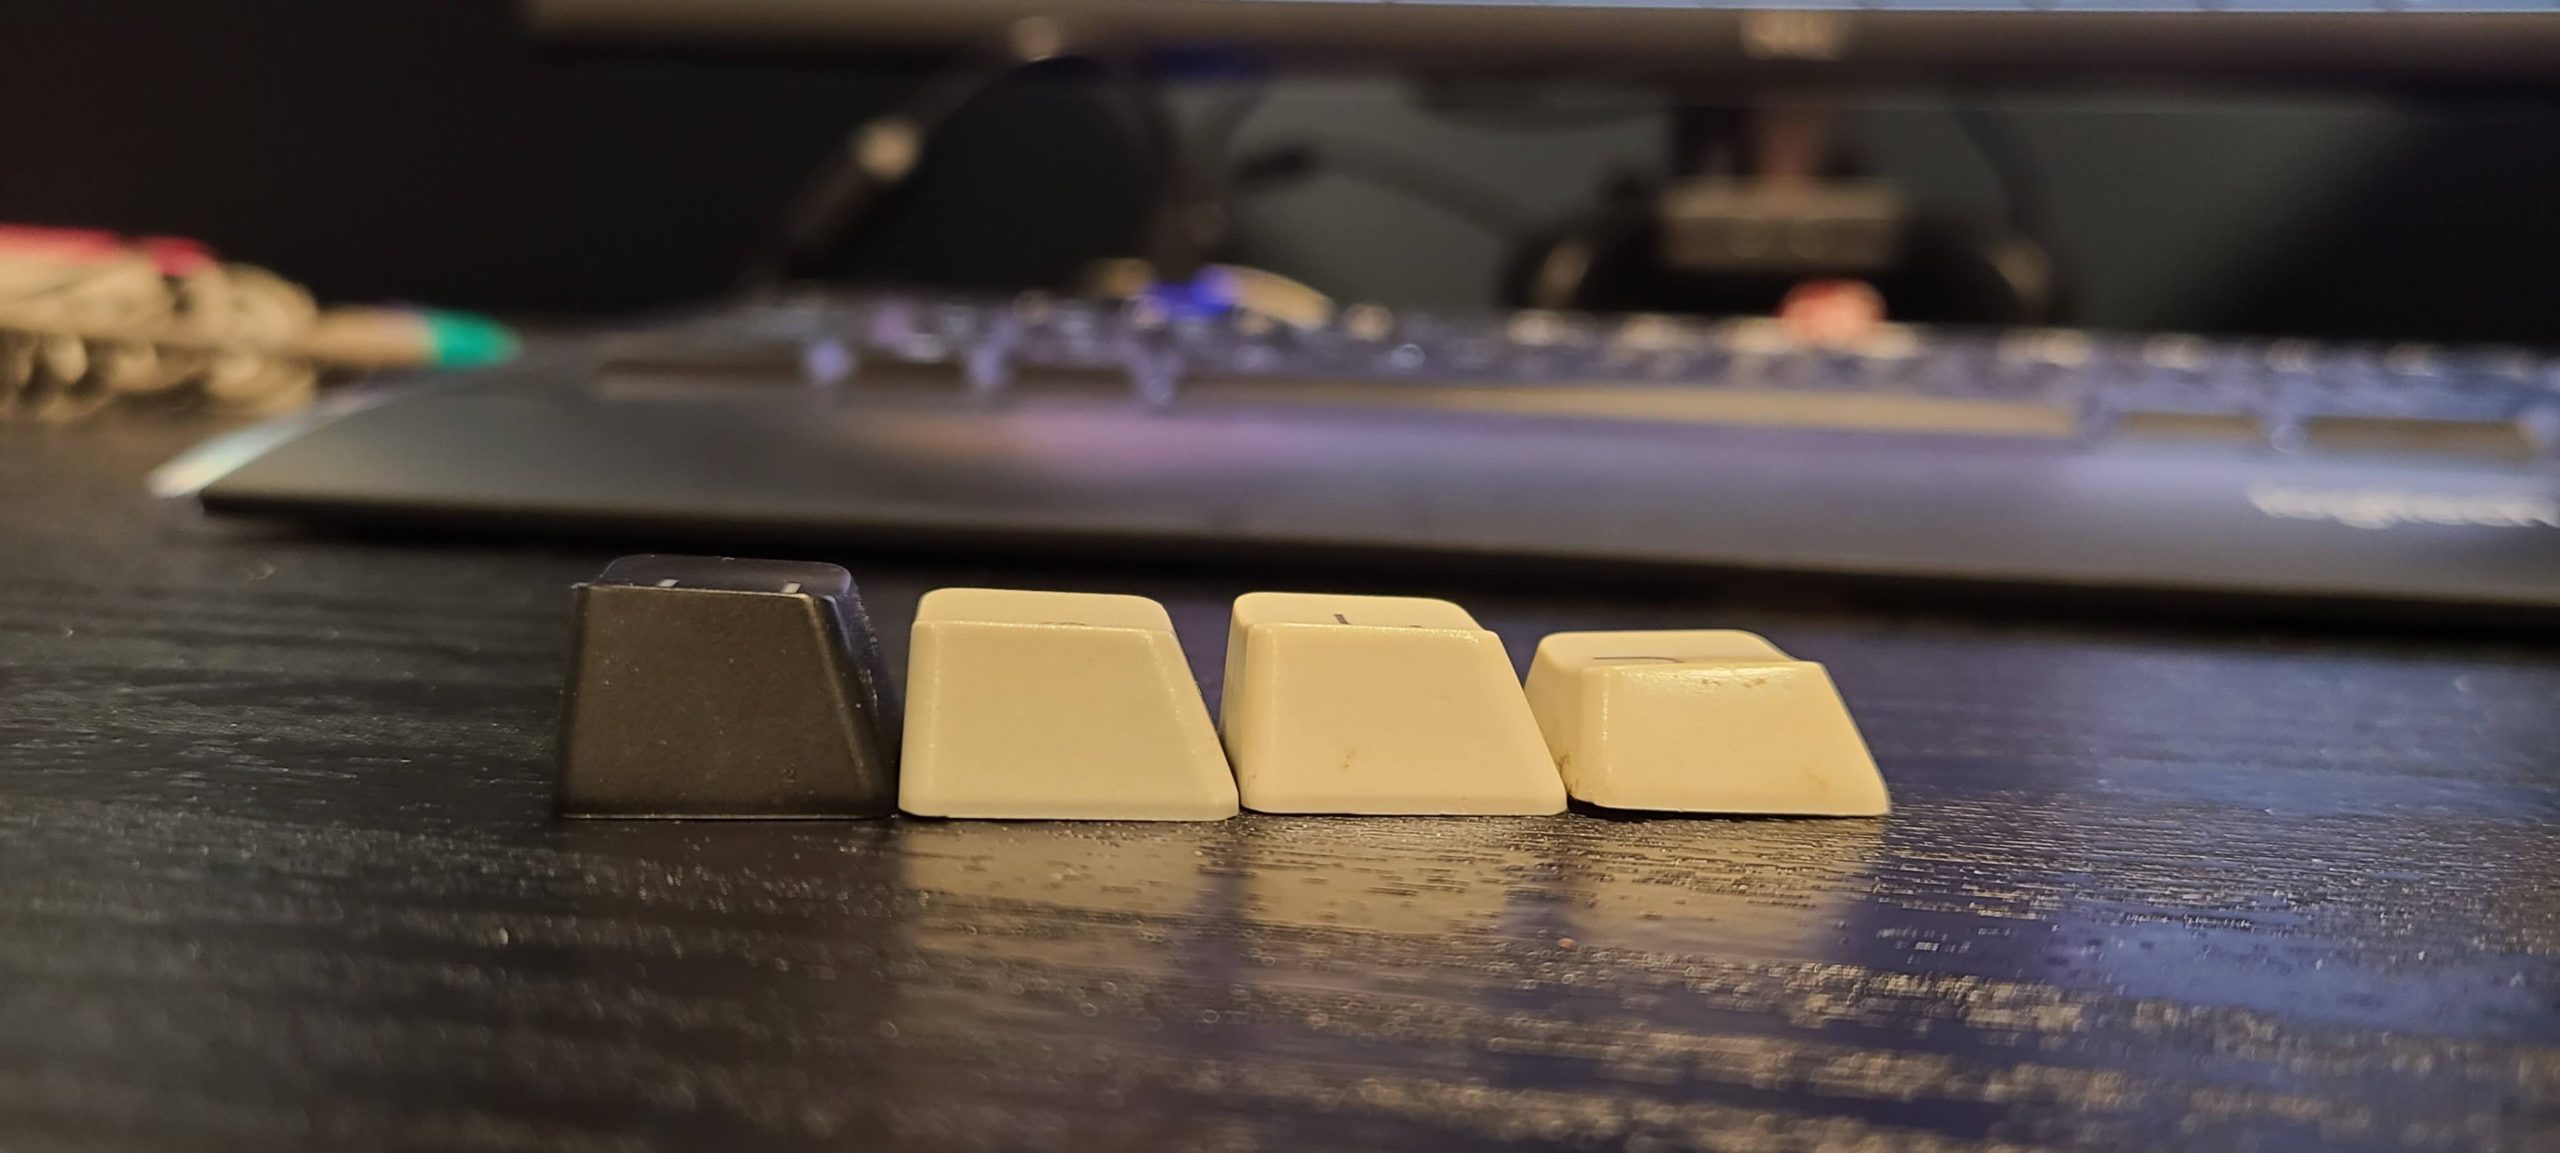
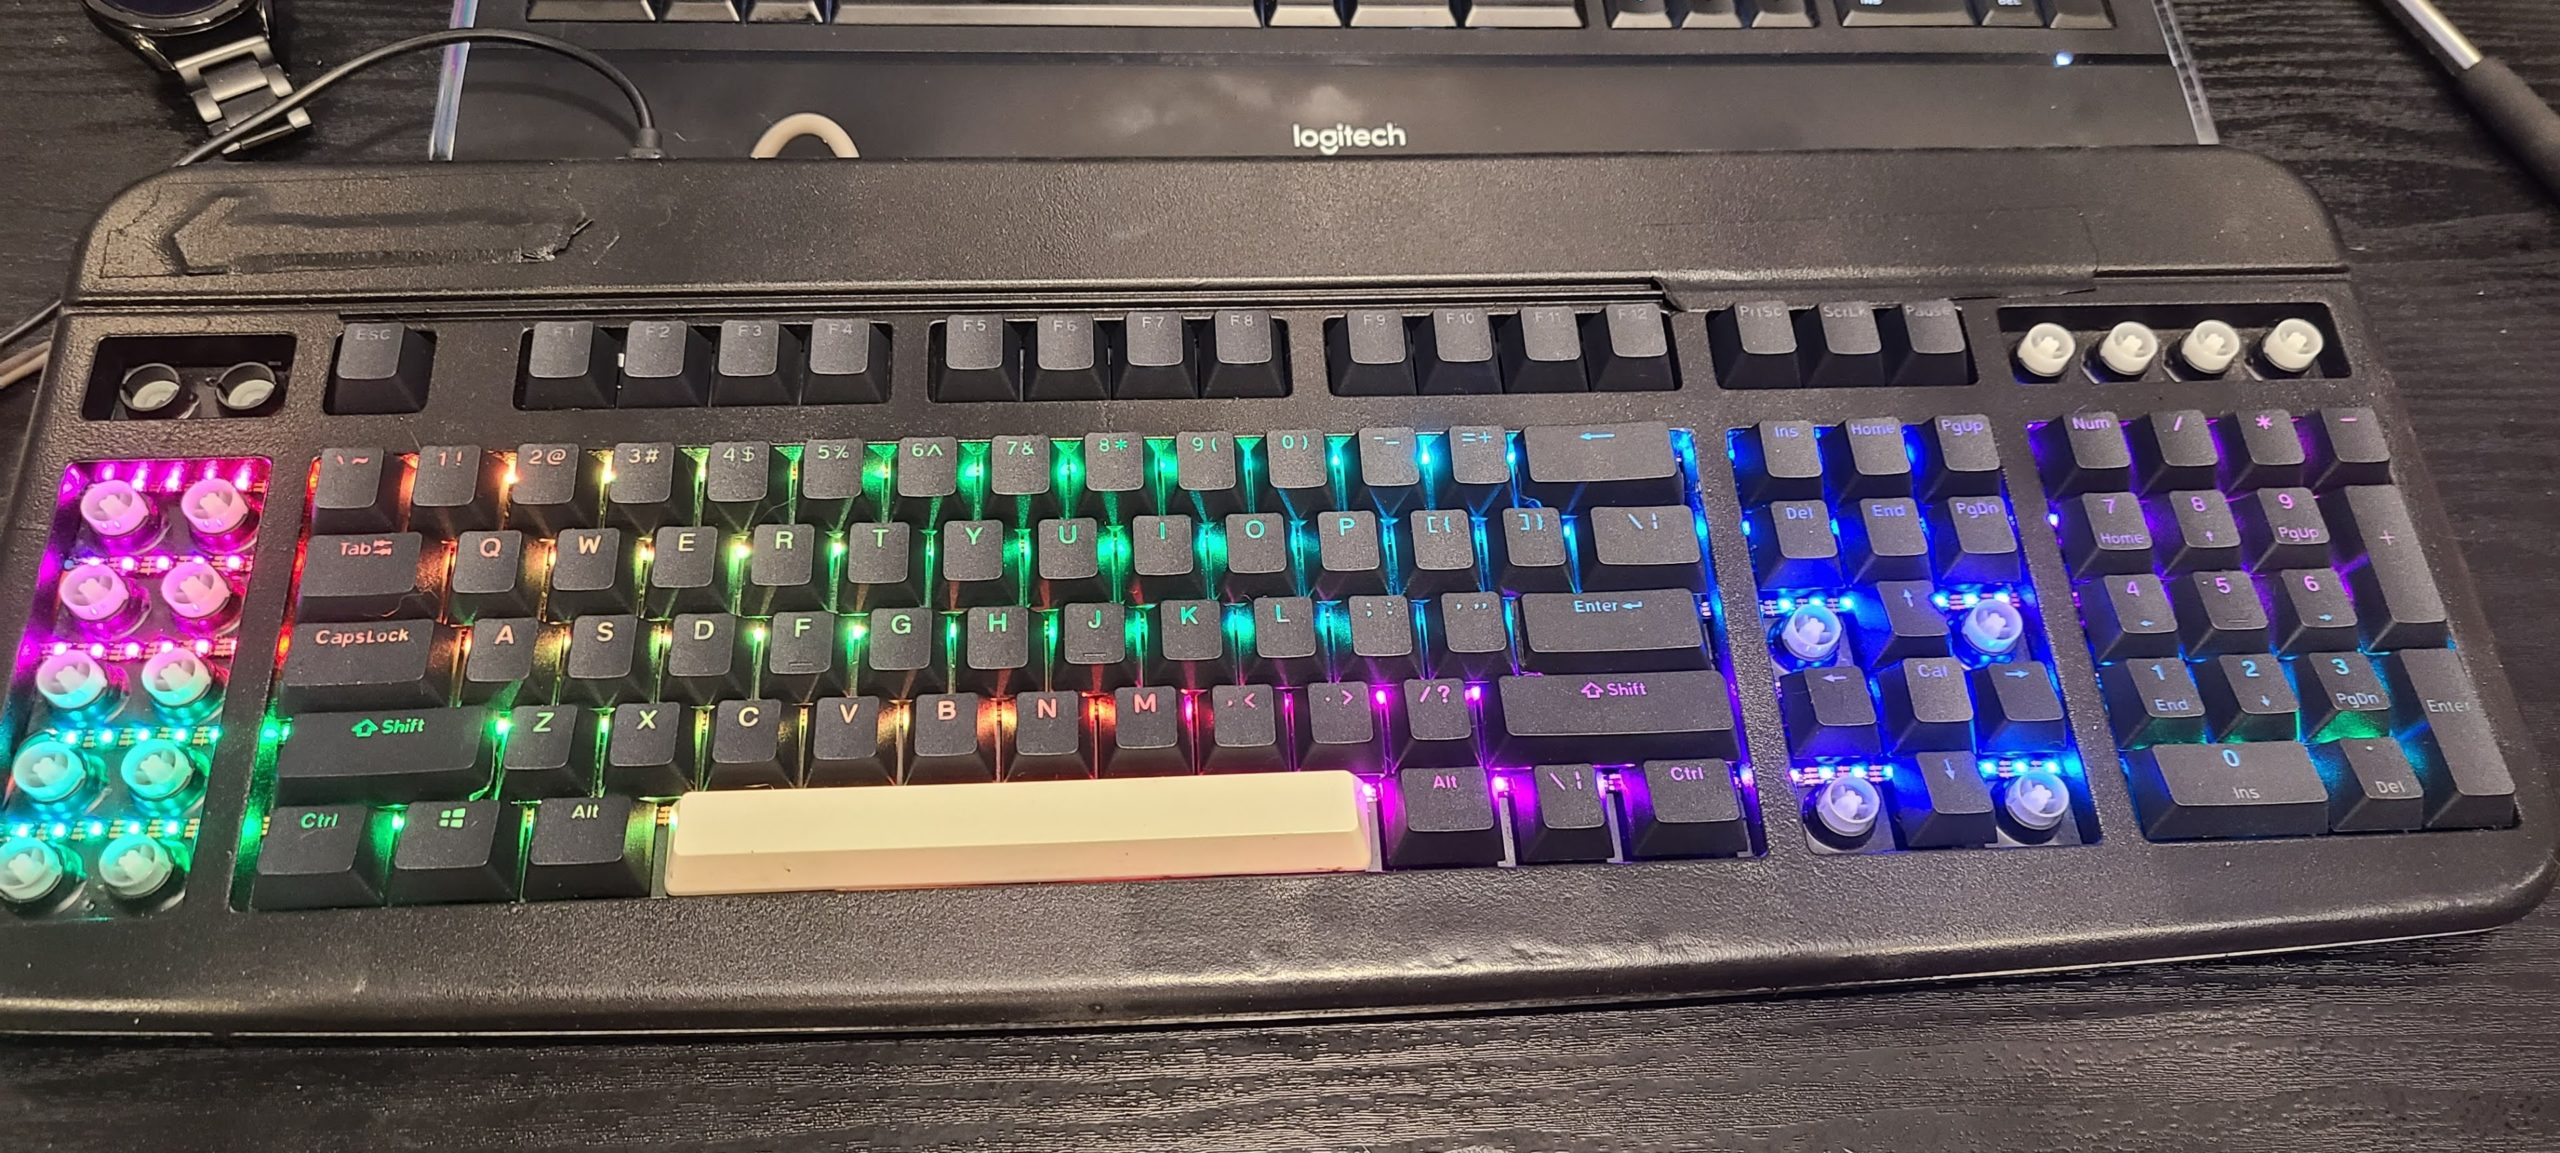
The next part was sourcing new keycaps, or the actual keys you type with. Since I wanted to get the full led effect, I spent a while looking for backlit keys, meaning they had some translucency in their design for light to shine through. These keys are pretty common, but almost exclusively in the OEM profile height and not Cherry profile, which the original keys are. I spent about a week scouring Reddit and numerous enthusiast keyboard sites for the keys that would meet my needs and ran into some issues.
First, being that this keyboard has more than the standard number of keys, I would probably need two sets of keycaps which could be costly. Second, cherry profile, in black and being backlit were damn near impossible to find. It would seem to be that OEM profile is the standard for mechanical keyboards these days. Third, the key layout is fairly antiquated in Western keyboards now and I wasn’t sure what the style was even called. You’ll notice the difference is that there space bar is extremely long, and the keys on either side are viewer and a lot of modern keyboards, and larger. A redditor gave me some information which helped a bit. The layout is called Tsangan, which is mainly used for custom Korean keyboards and have 1.5u modifiers, a 7u space bar, 1u modifier keys and a short right Shift. Finding a cherry profile, black, backlit keyset in Tsangan style did not happen. I’ve been unable to find any 7u length space bars either. This led me to the conclusion I’d need a spare Anykey keyboard where I’d have to remove and paint some keys to use in this project. There were some other nuances with keys as well. Several of the longer keys use a metal bar which hooks into the keyboard’s baseplate to smooth out the keypress, otherwise pressure too much on one side could cause the key to not depress evenly.
Also, there’s the BIGASS enter key problem. You’ll notice the enter key is very large and finding any of these in the configuration I wanted also proved impossible. Whether the profile was wrong, the color, lack of backlighting or the under-support, I had no luck.
I eventually found a keycap set from China that met several of my criteria, the color, profile height, and being backlit. I grabbed them off of Amazon and they arrived in 10 days which was much quicker than the anticipated 1.5 months. The keys aren’t bad, they’re a little tight to get on the board, and the color is maybe a faded black, but otherwise they’re what I was looking for.